- Club Caddie
- Tee Sheet
-
Troubleshooting
-
General
-
Settings
- 3P Integrations
- Card Connect
- Clover
- POSLink
- Class Management
- Class Rate Management
- Course User Info
- Day End Closing
- Event Settings
- Floor Plan
- General Course Info
- I-Frames
- Inventory Center
- Manage Roles
- Membership Settings
- Mobile App Builder
- Payroll Center
- Punch Card Type Center
- Register Settings
- Rack Rate Management
- Tax Management
- Tee Sheet Settings
- Terminal Management
- Venue Center
-
Support
-
Register
-
Tee Sheet
-
Starter Sheet
-
Activities
-
Events
-
On Demand
-
Customers
-
Members
-
Vouchers
-
Sales
-
Reports
-
Quickbooks
-
Hardware
-
Mobile App
-
Email Marketing
-
KDS (Kitchen Display System)
-
Video Training
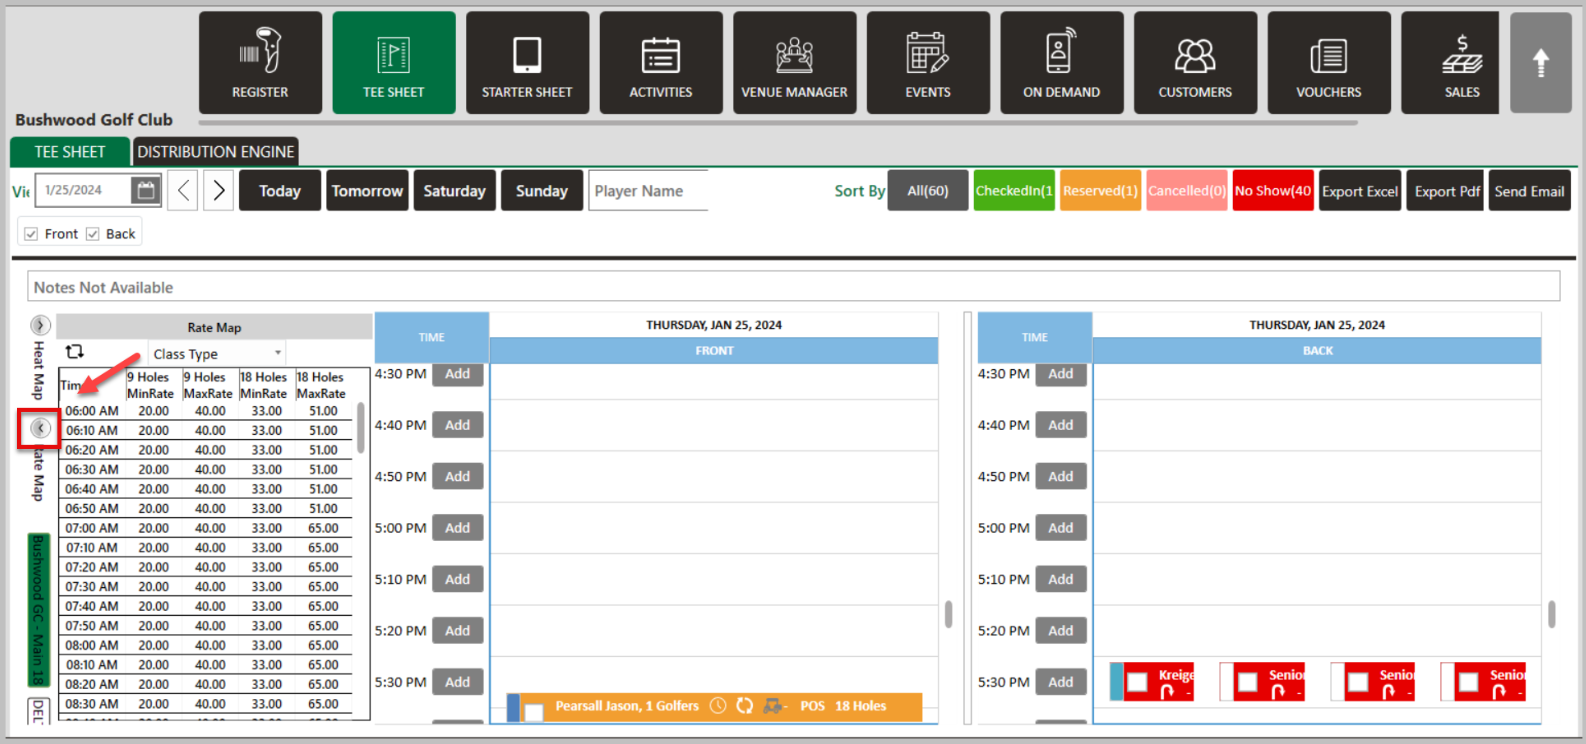
Tee Sheet : Rate Map
Article Contents: This article contains step-by-step instructions on how to enable the Rate Map for the tee sheet.
Step by StepStep 1: You need to enable the Rate Map option if it is disabled on the tee sheet. To do so, first click on Settings followed by the Manage Roles tab.
Step 2: Under Action, click on the three small dots, followed by Edit Permission. The system will prompt a Manage Roles and Access pop up. Click on the "+" sign and then "Tee Sheet" and then locate the Rate Map option. Click on it to enable the option.
Step 3: Navigate to the Tee Sheet, and on the left hand side, select the arrow for the option Rate Map.