- Club Caddie
- Settings
- Inventory Center
-
Troubleshooting
-
General
-
Settings
- 3P Integrations
- Card Connect
- Clover
- POSLink
- Class Management
- Class Rate Management
- Course User Info
- Day End Closing
- Event Settings
- Floor Plan
- General Course Info
- I-Frames
- Inventory Center
- Manage Roles
- Membership Settings
- Mobile App Builder
- Payroll Center
- Punch Card Type Center
- Register Settings
- Rack Rate Management
- Tax Management
- Tee Sheet Settings
- Terminal Management
- Venue Center
-
Support
-
Register
-
Tee Sheet
-
Starter Sheet
-
Activities
-
Events
-
On Demand
-
Customers
-
Members
-
Vouchers
-
Sales
-
Reports
-
Quickbooks
-
Hardware
-
Mobile App
-
Email Marketing
-
KDS (Kitchen Display System)
-
Video Training
Settings : Adding Shipping Costs
Article Contents: This is a guide on how to include shipping cost when receiving inventory.
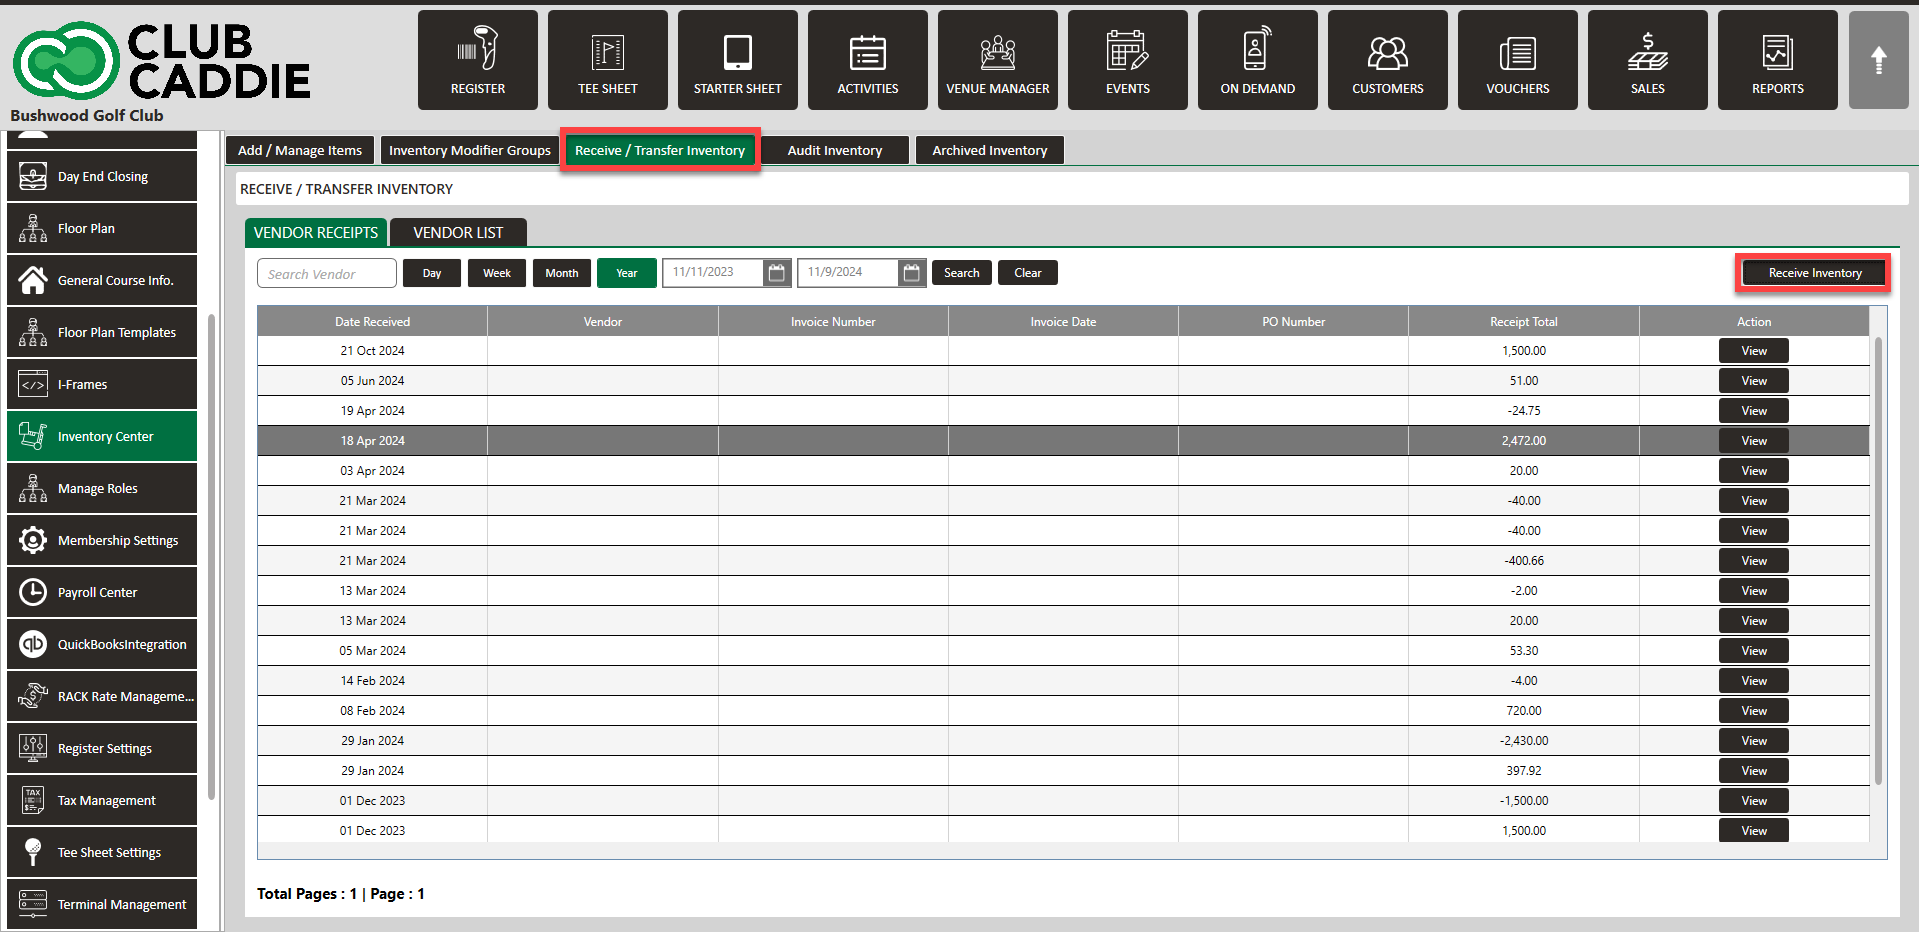
Step by StepStep 1: Navigate to Settings and then select Inventory Center from the left-hand-side menu.
Step 2: Click on the Receive/Transfer Inventory tab. Then, select Receive Inventory on the left side.
Step 3: A Receive Inventory window will display where you will enter the Invoice Number, Vendor, PO Number, Invoice Date, then search for an item or Add New Item, and then enter Shipping Cost.
Step 4: Enter Received Qty and Received Unit Cost. Then click Submit.
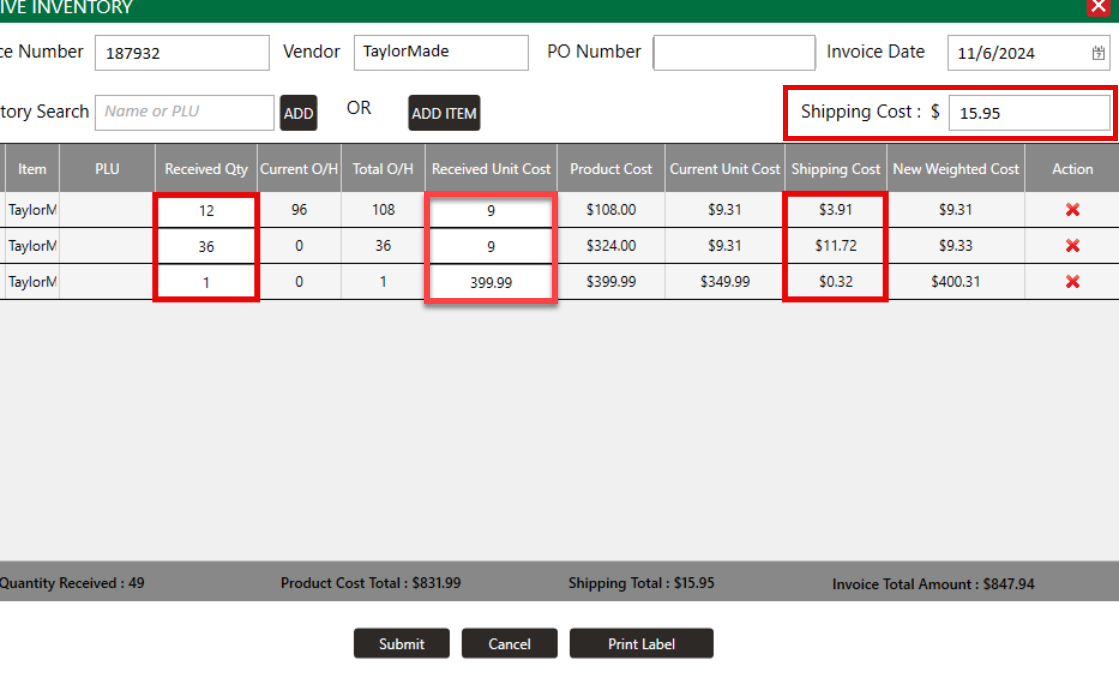
Note: Notice above that the shipping cost is prorated by line item