.png?width=200&height=89&name=CC%20%20fiserv.%20(3).png)
Requirements:
To use this hardware with your Club Caddie system, you need to meet the following requirements:
Where to buy the Epson TM-m30II receipt printer:
The Epson TM-m30II receipt printer is available from the Club Caddie Hardware Store for merchants, available here.
Plug in your Epson TM-m30II receipt printer:
Before you can use the Epson TM-m30II receipt printer, you need to connect your printer to the power supply.
Step by Step
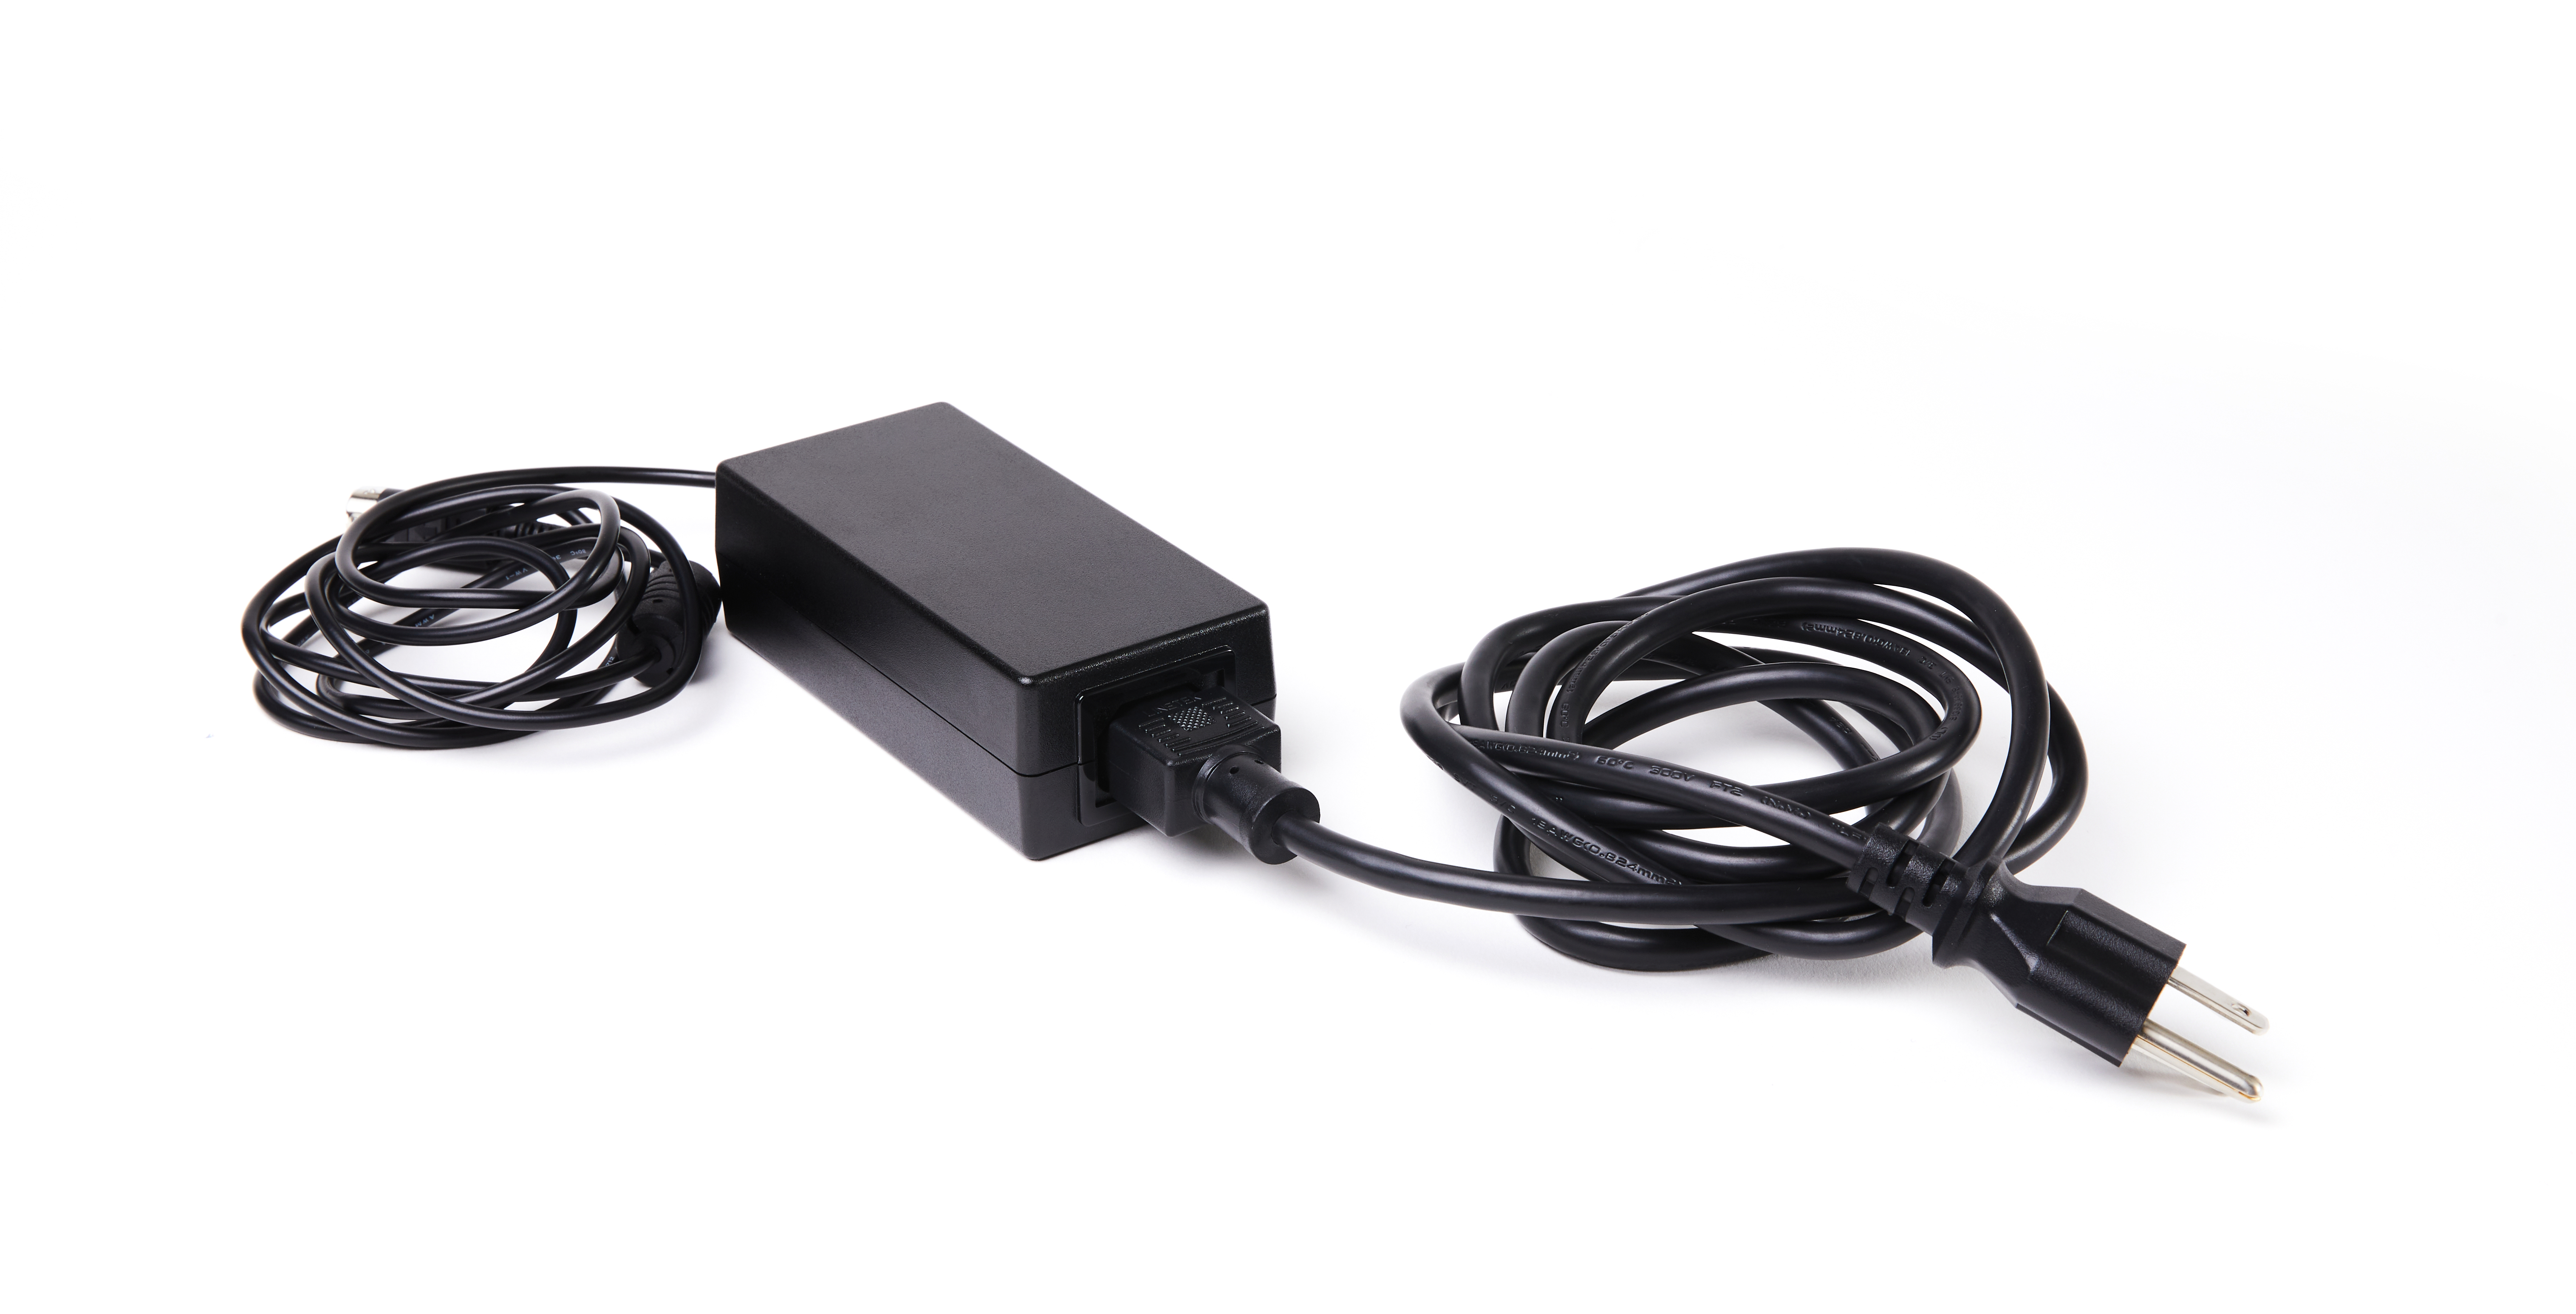
Step 1: Connect your printer. To connect your printer, you need its AC adapter, AC cable and LAN cable.
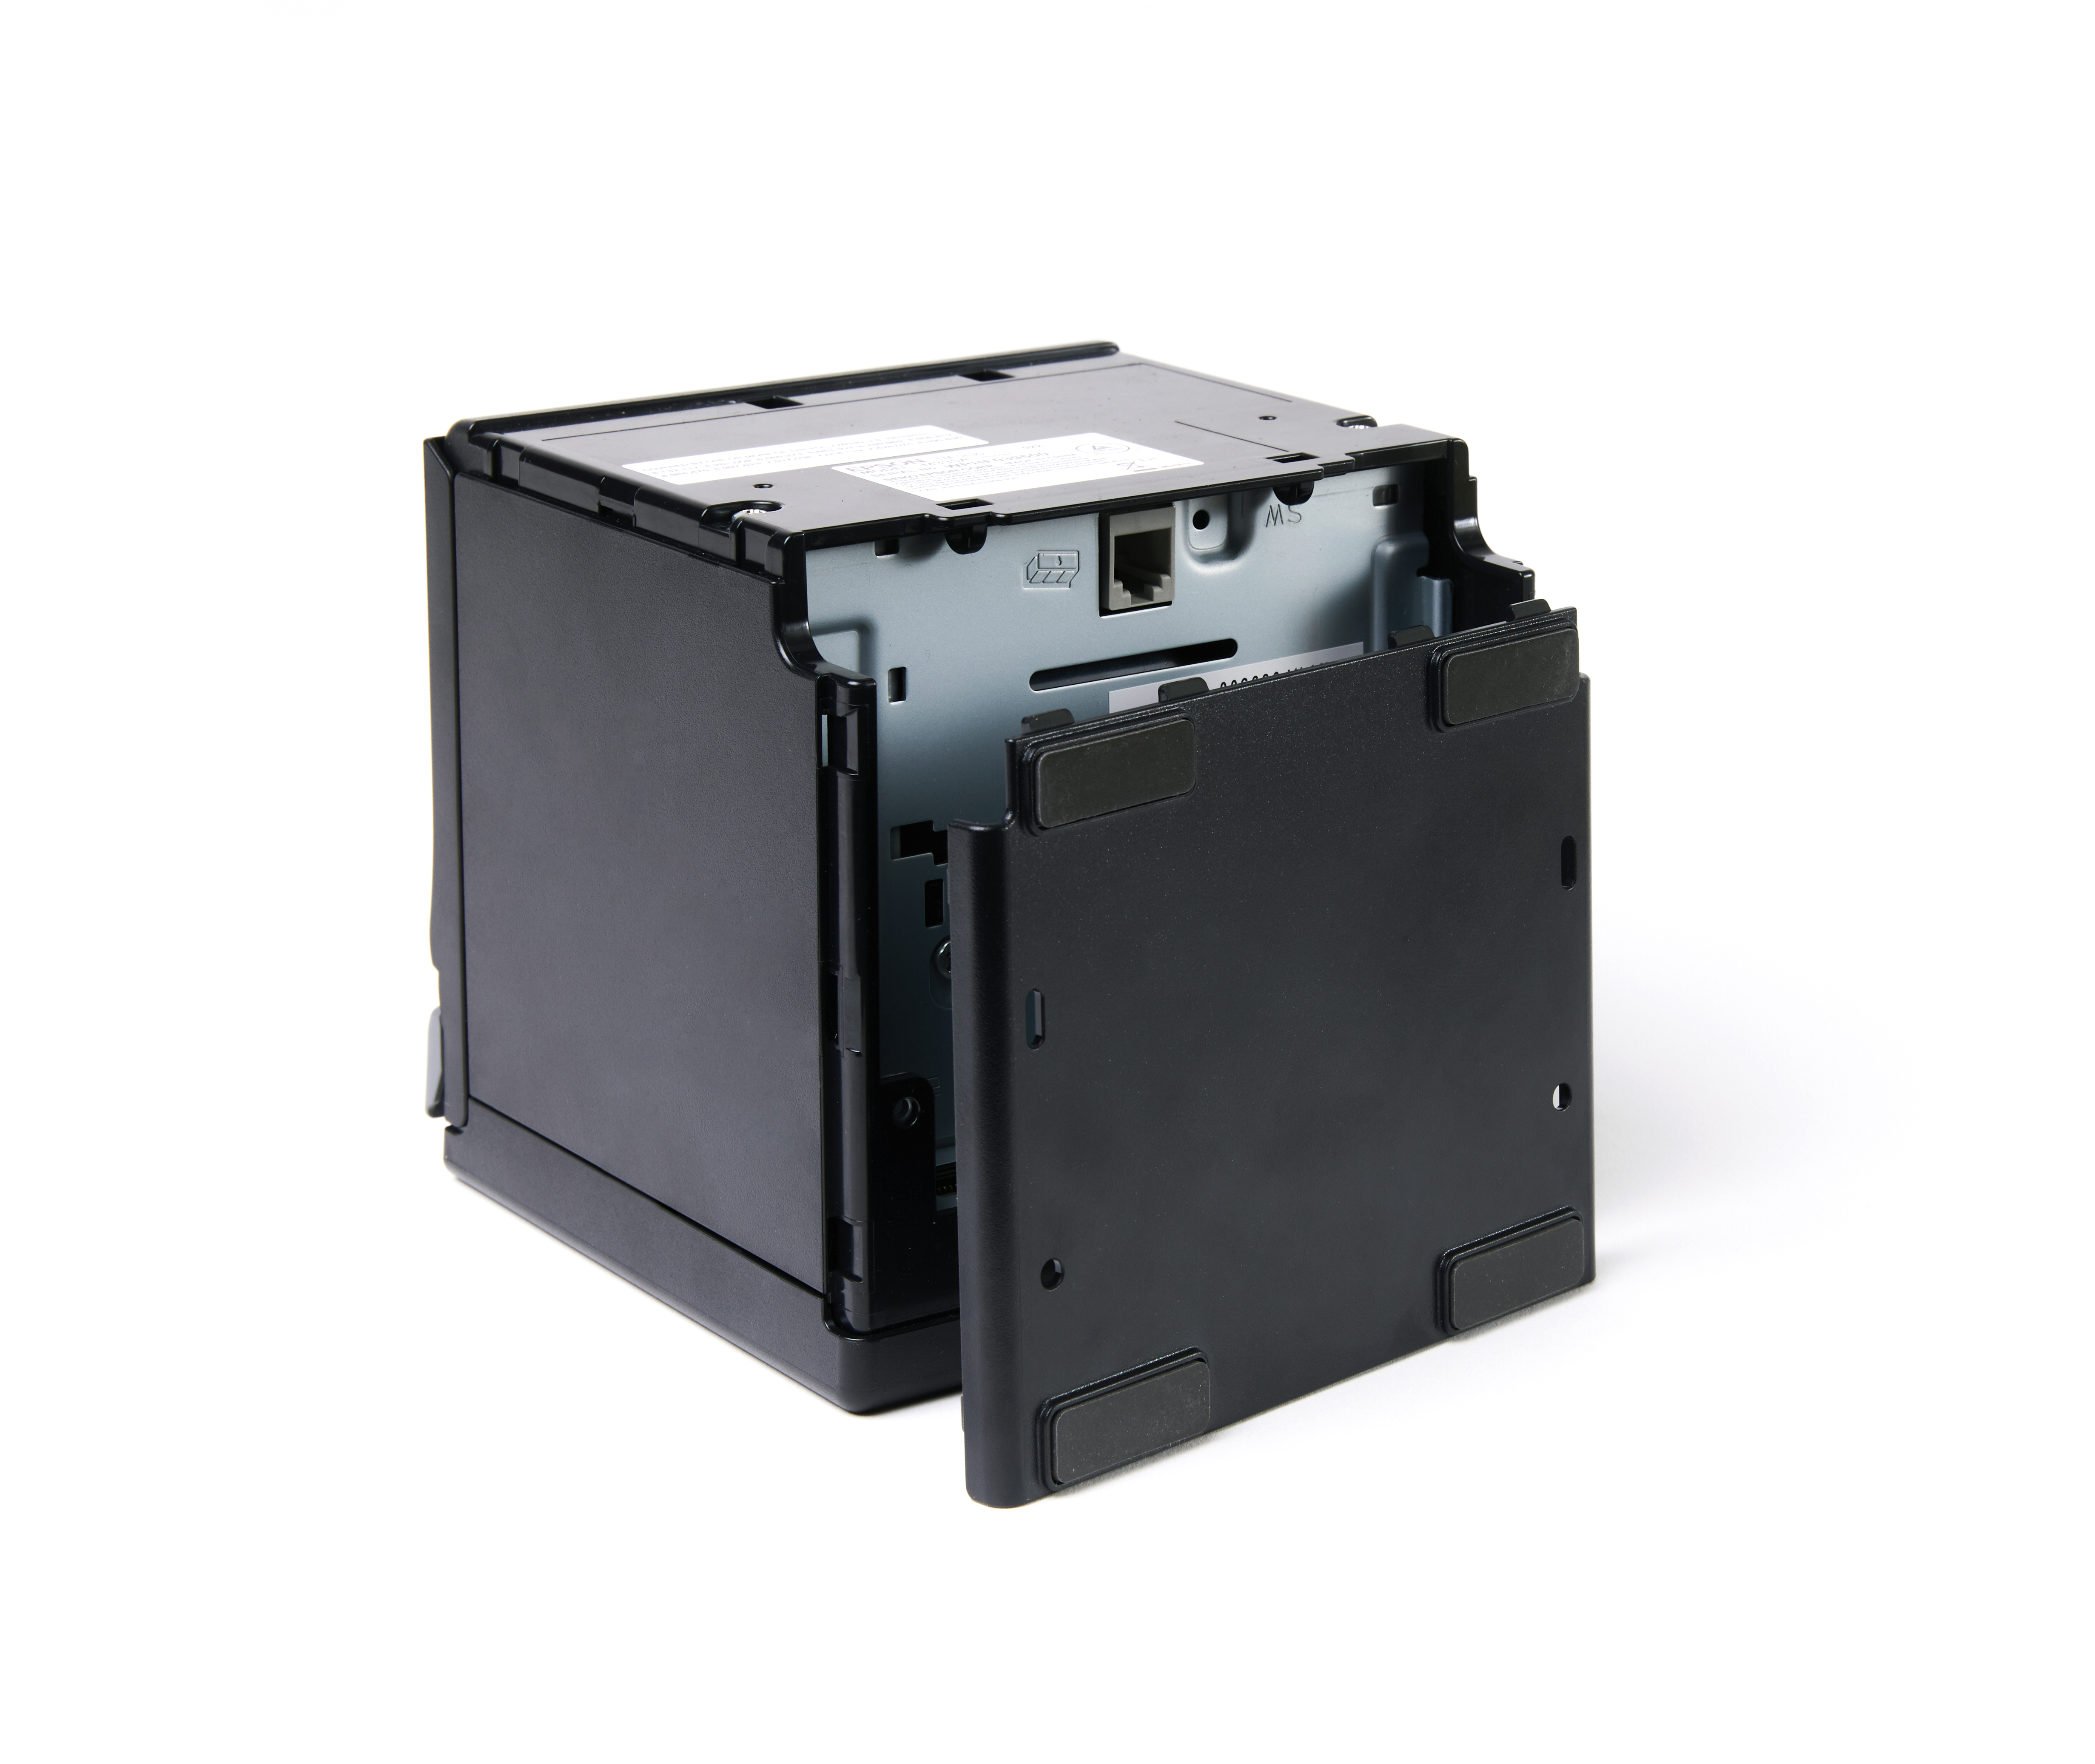
Note: The images below are of the Epson TM-m30. The location of the ports vary slightly for the Epson TM-m30II-NT.
Remove the back and bottom covers of your printer
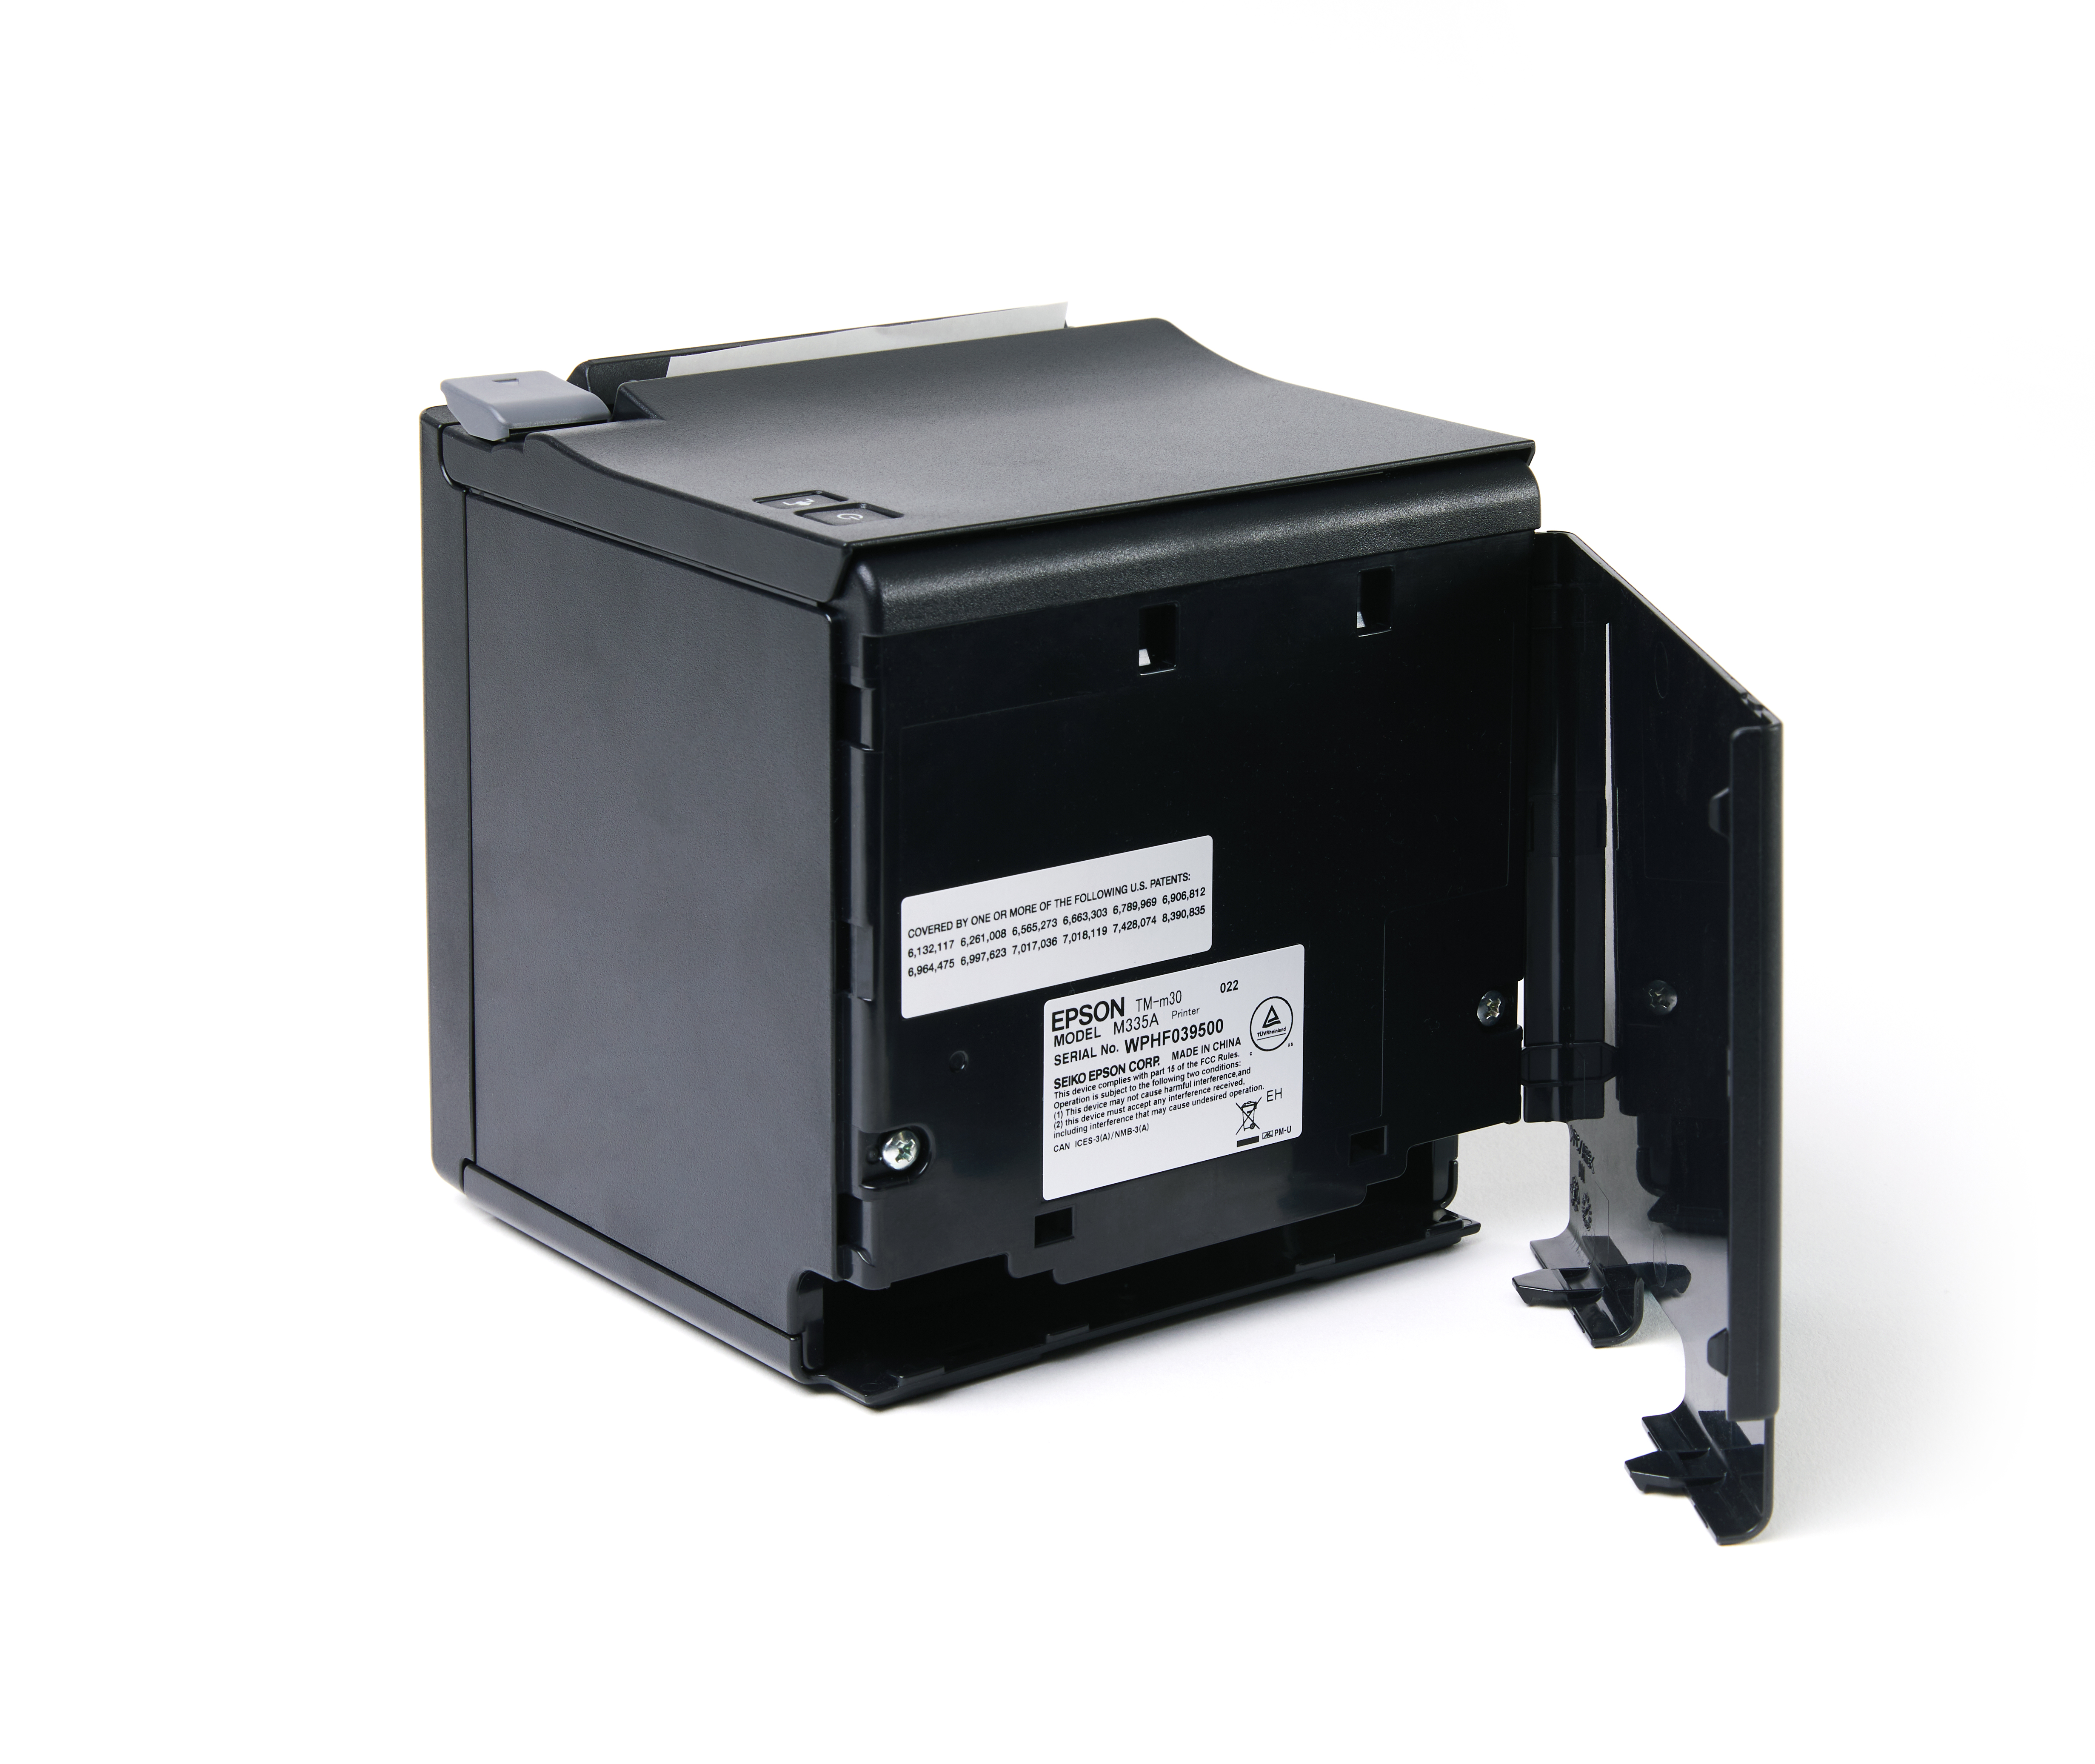
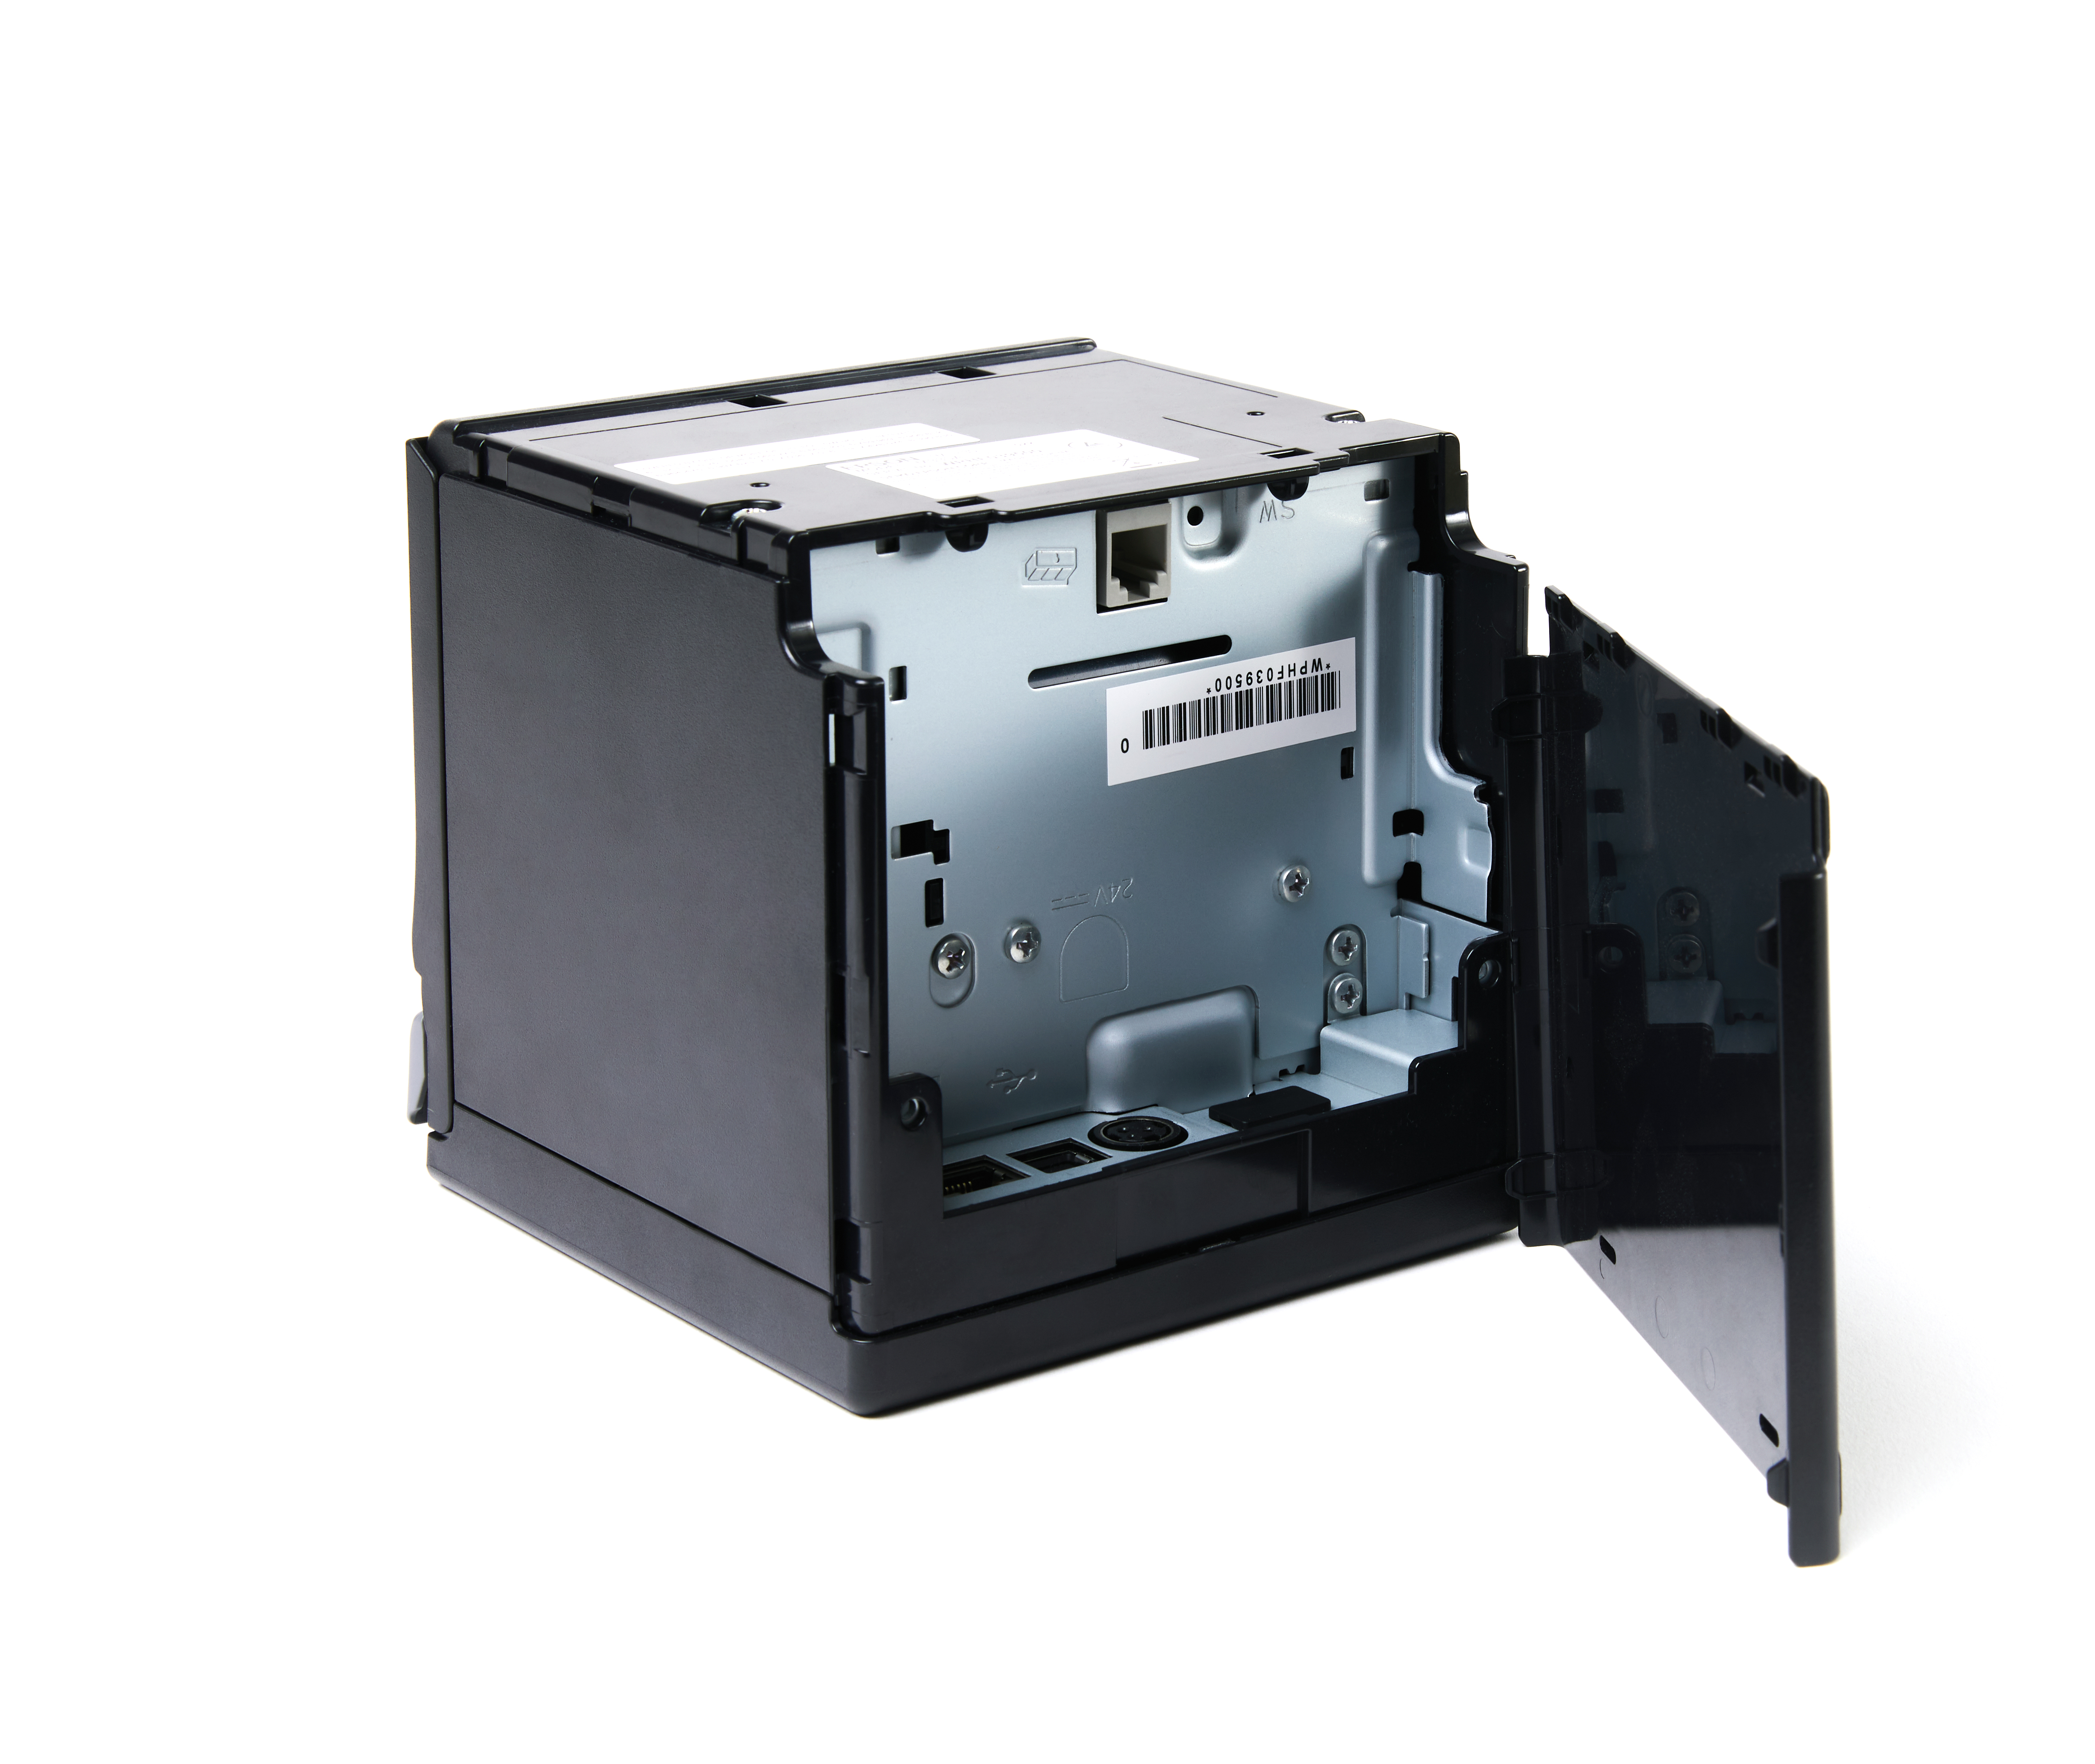
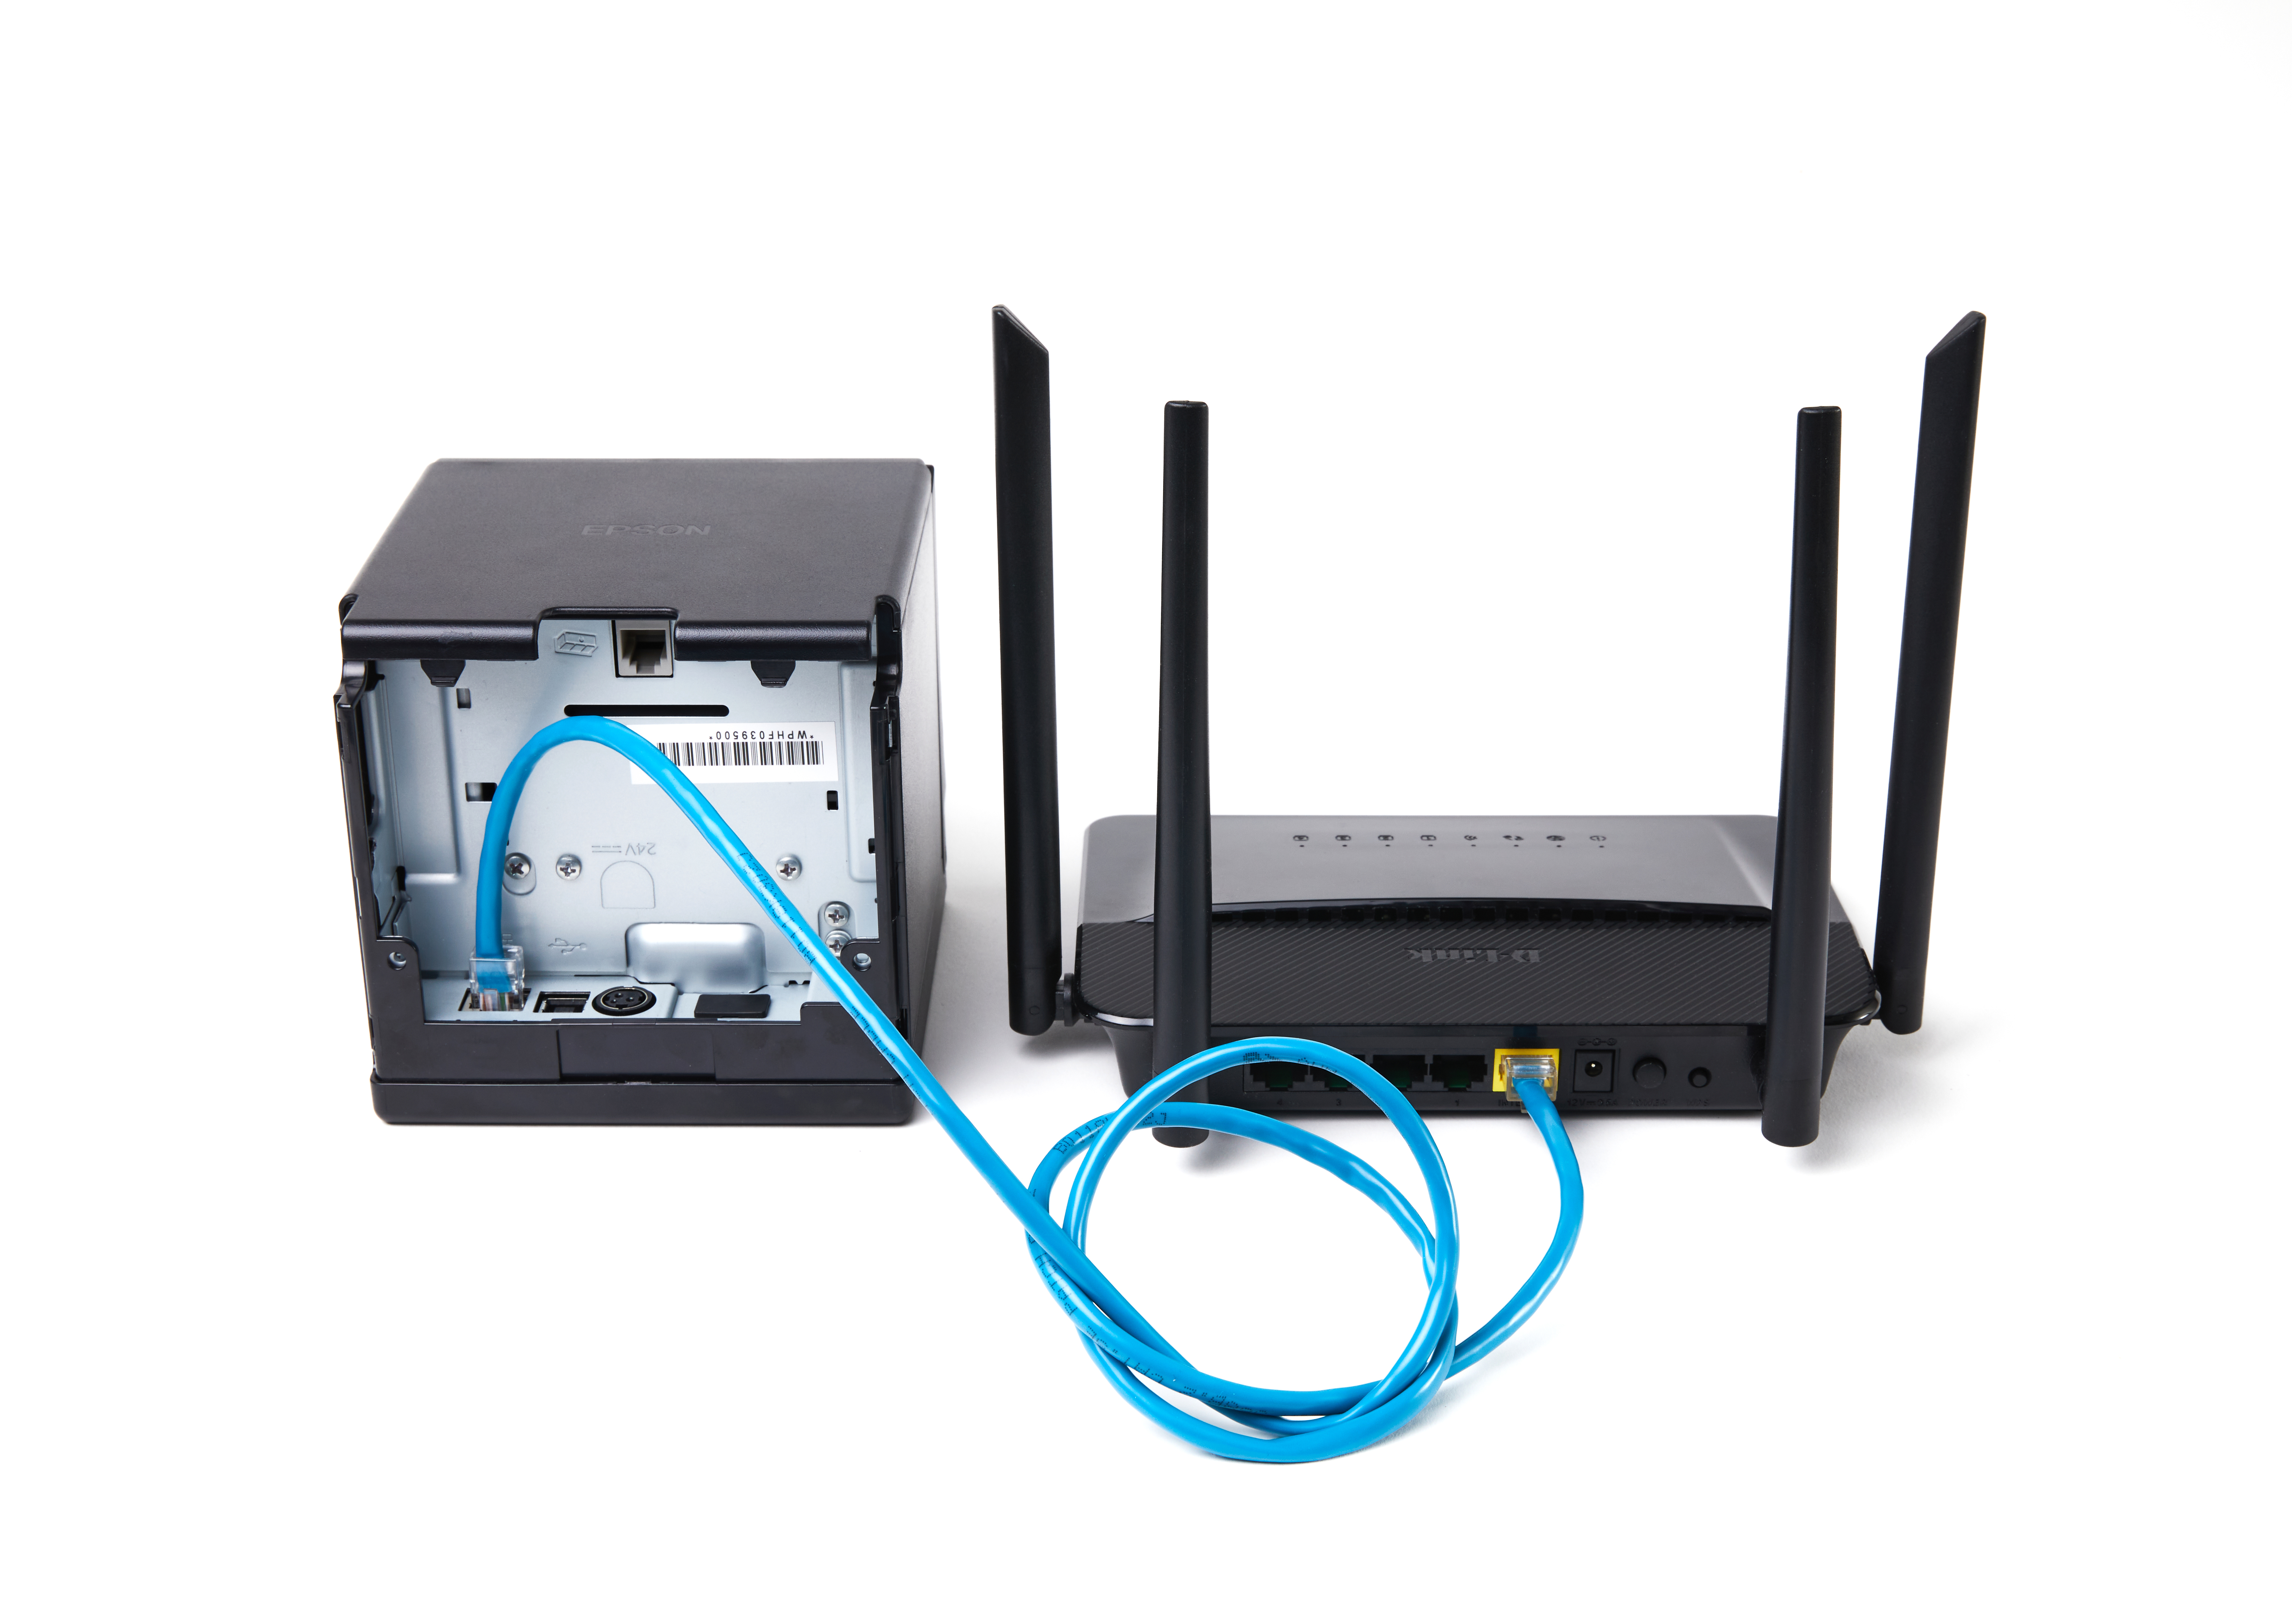
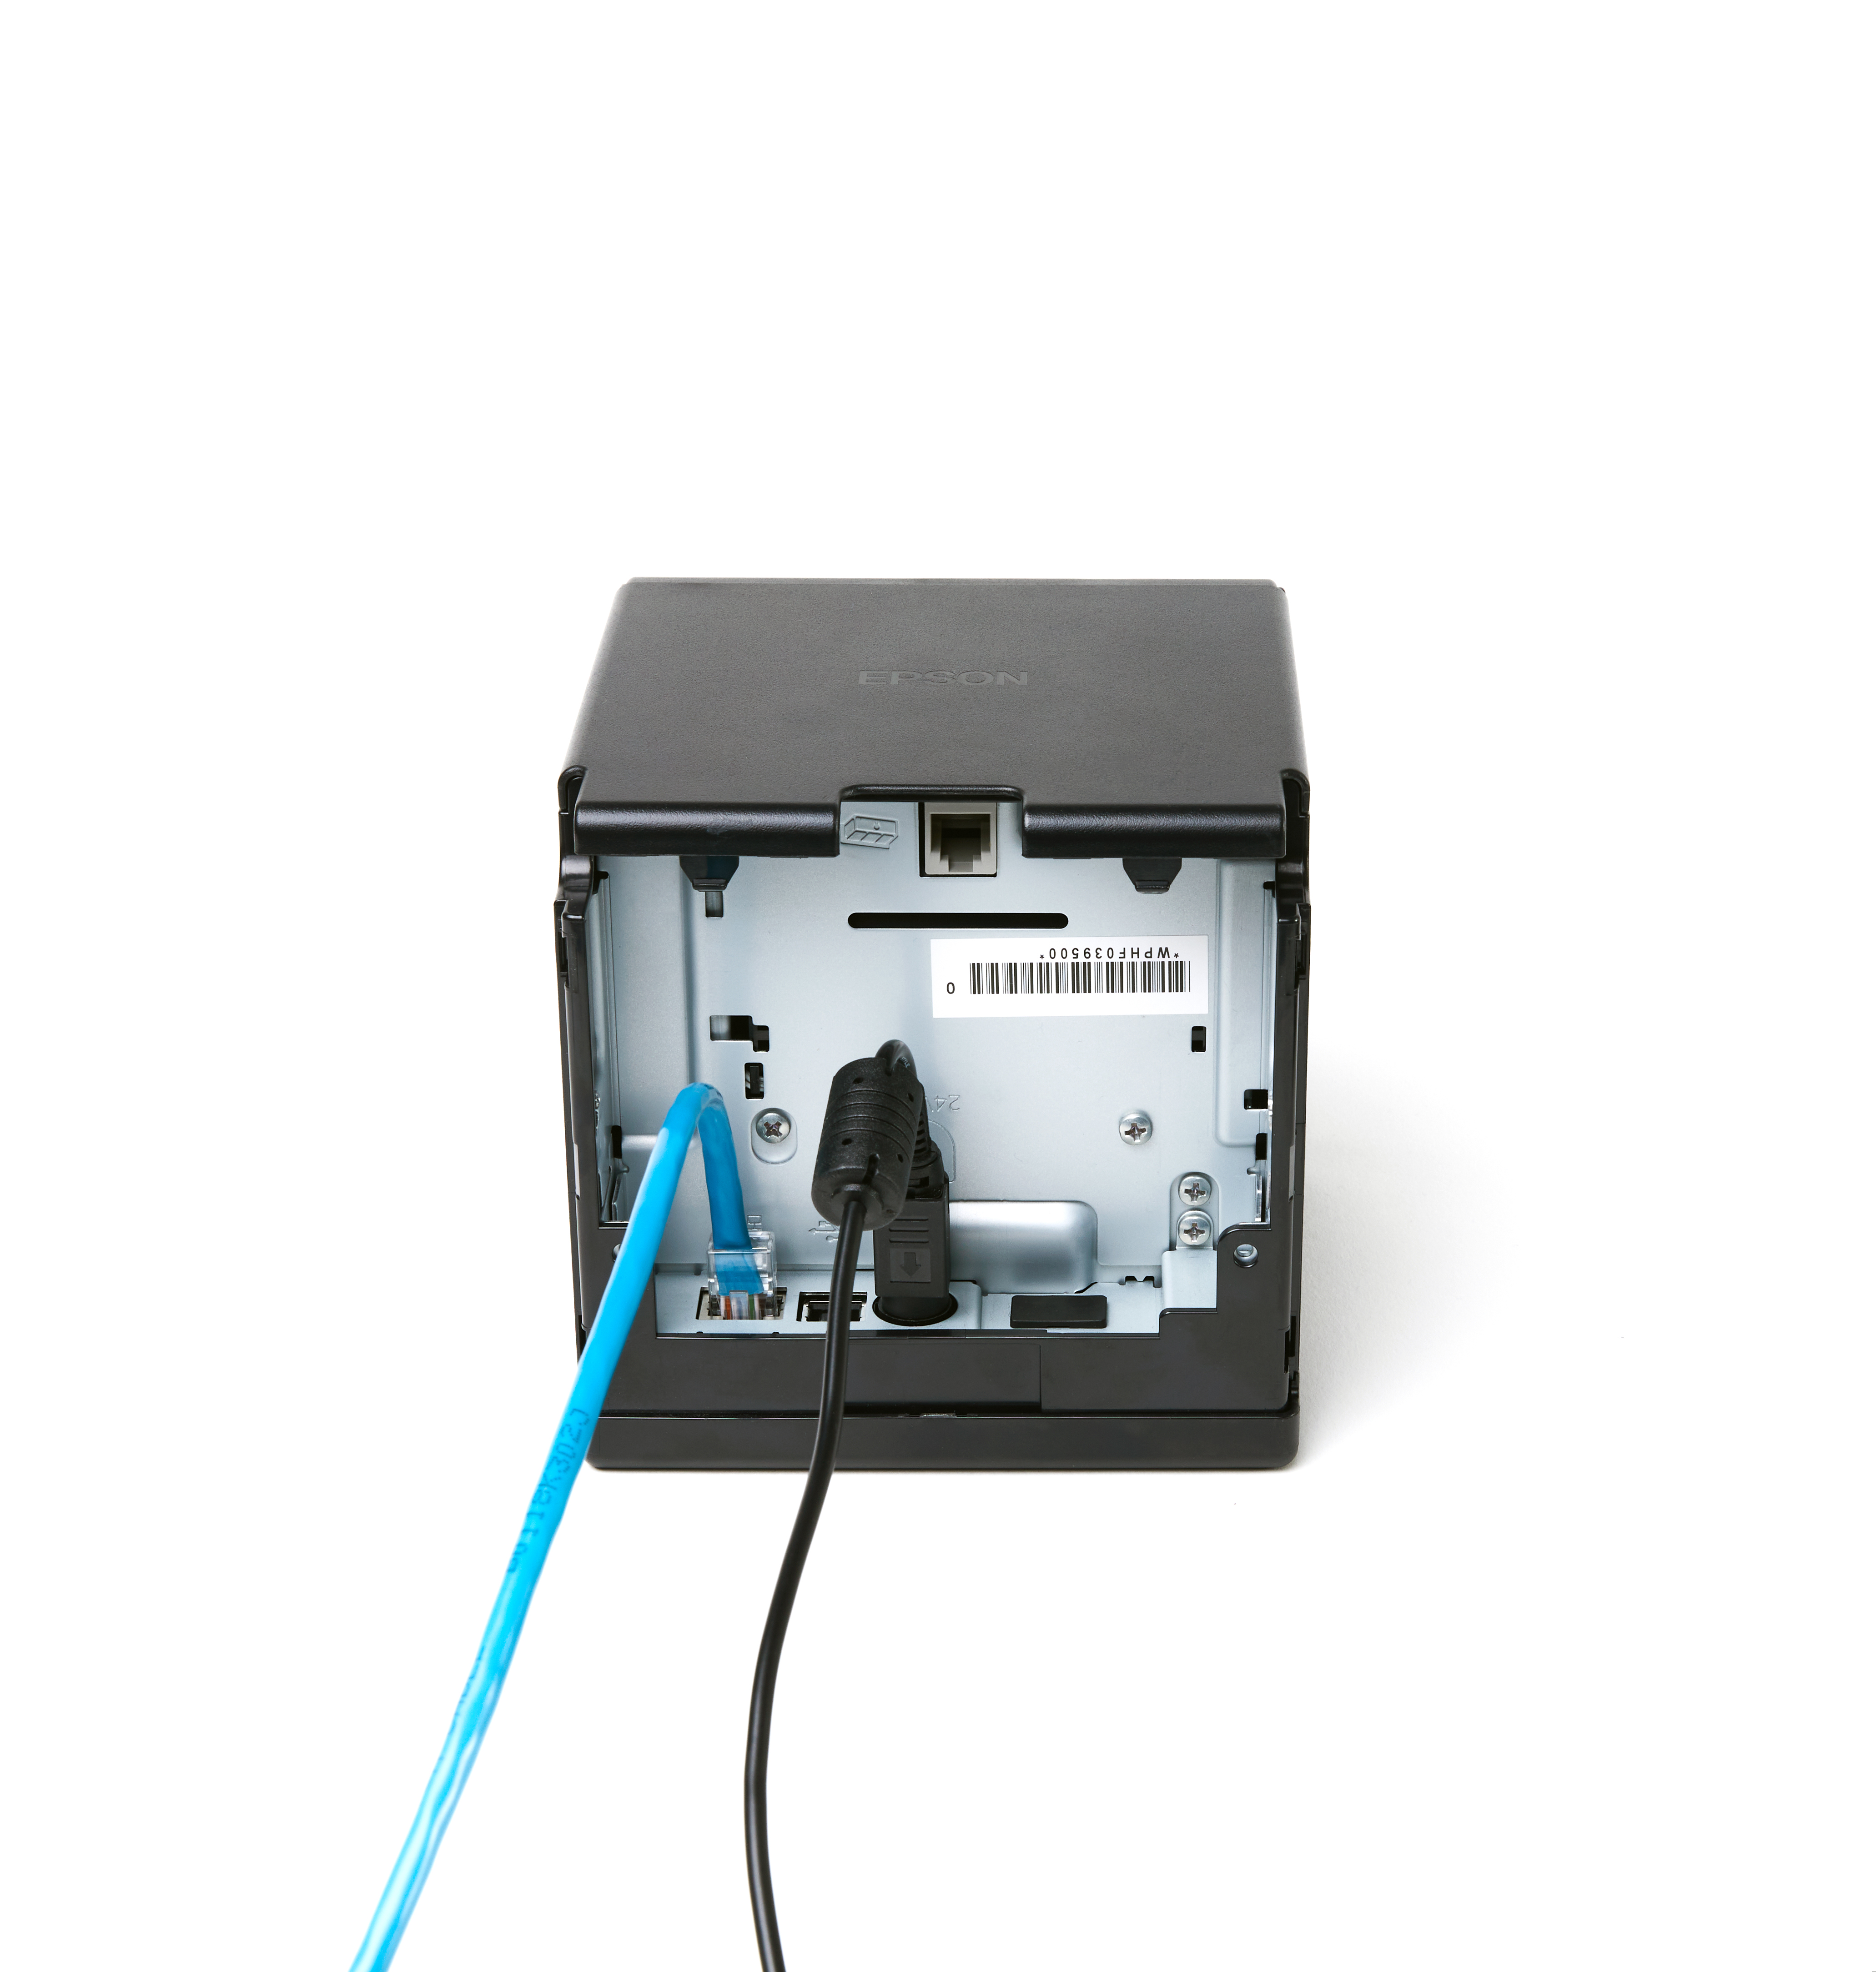
Step 2: Connect the LAN cable to your printer and a LAN port on your router or wall.
Step 3: Connect the AC adapter to your printer. Connect the AC cable to the AC adapter and an electrical outlet.
Step 4: Attach the bottom and back covers to your printer.
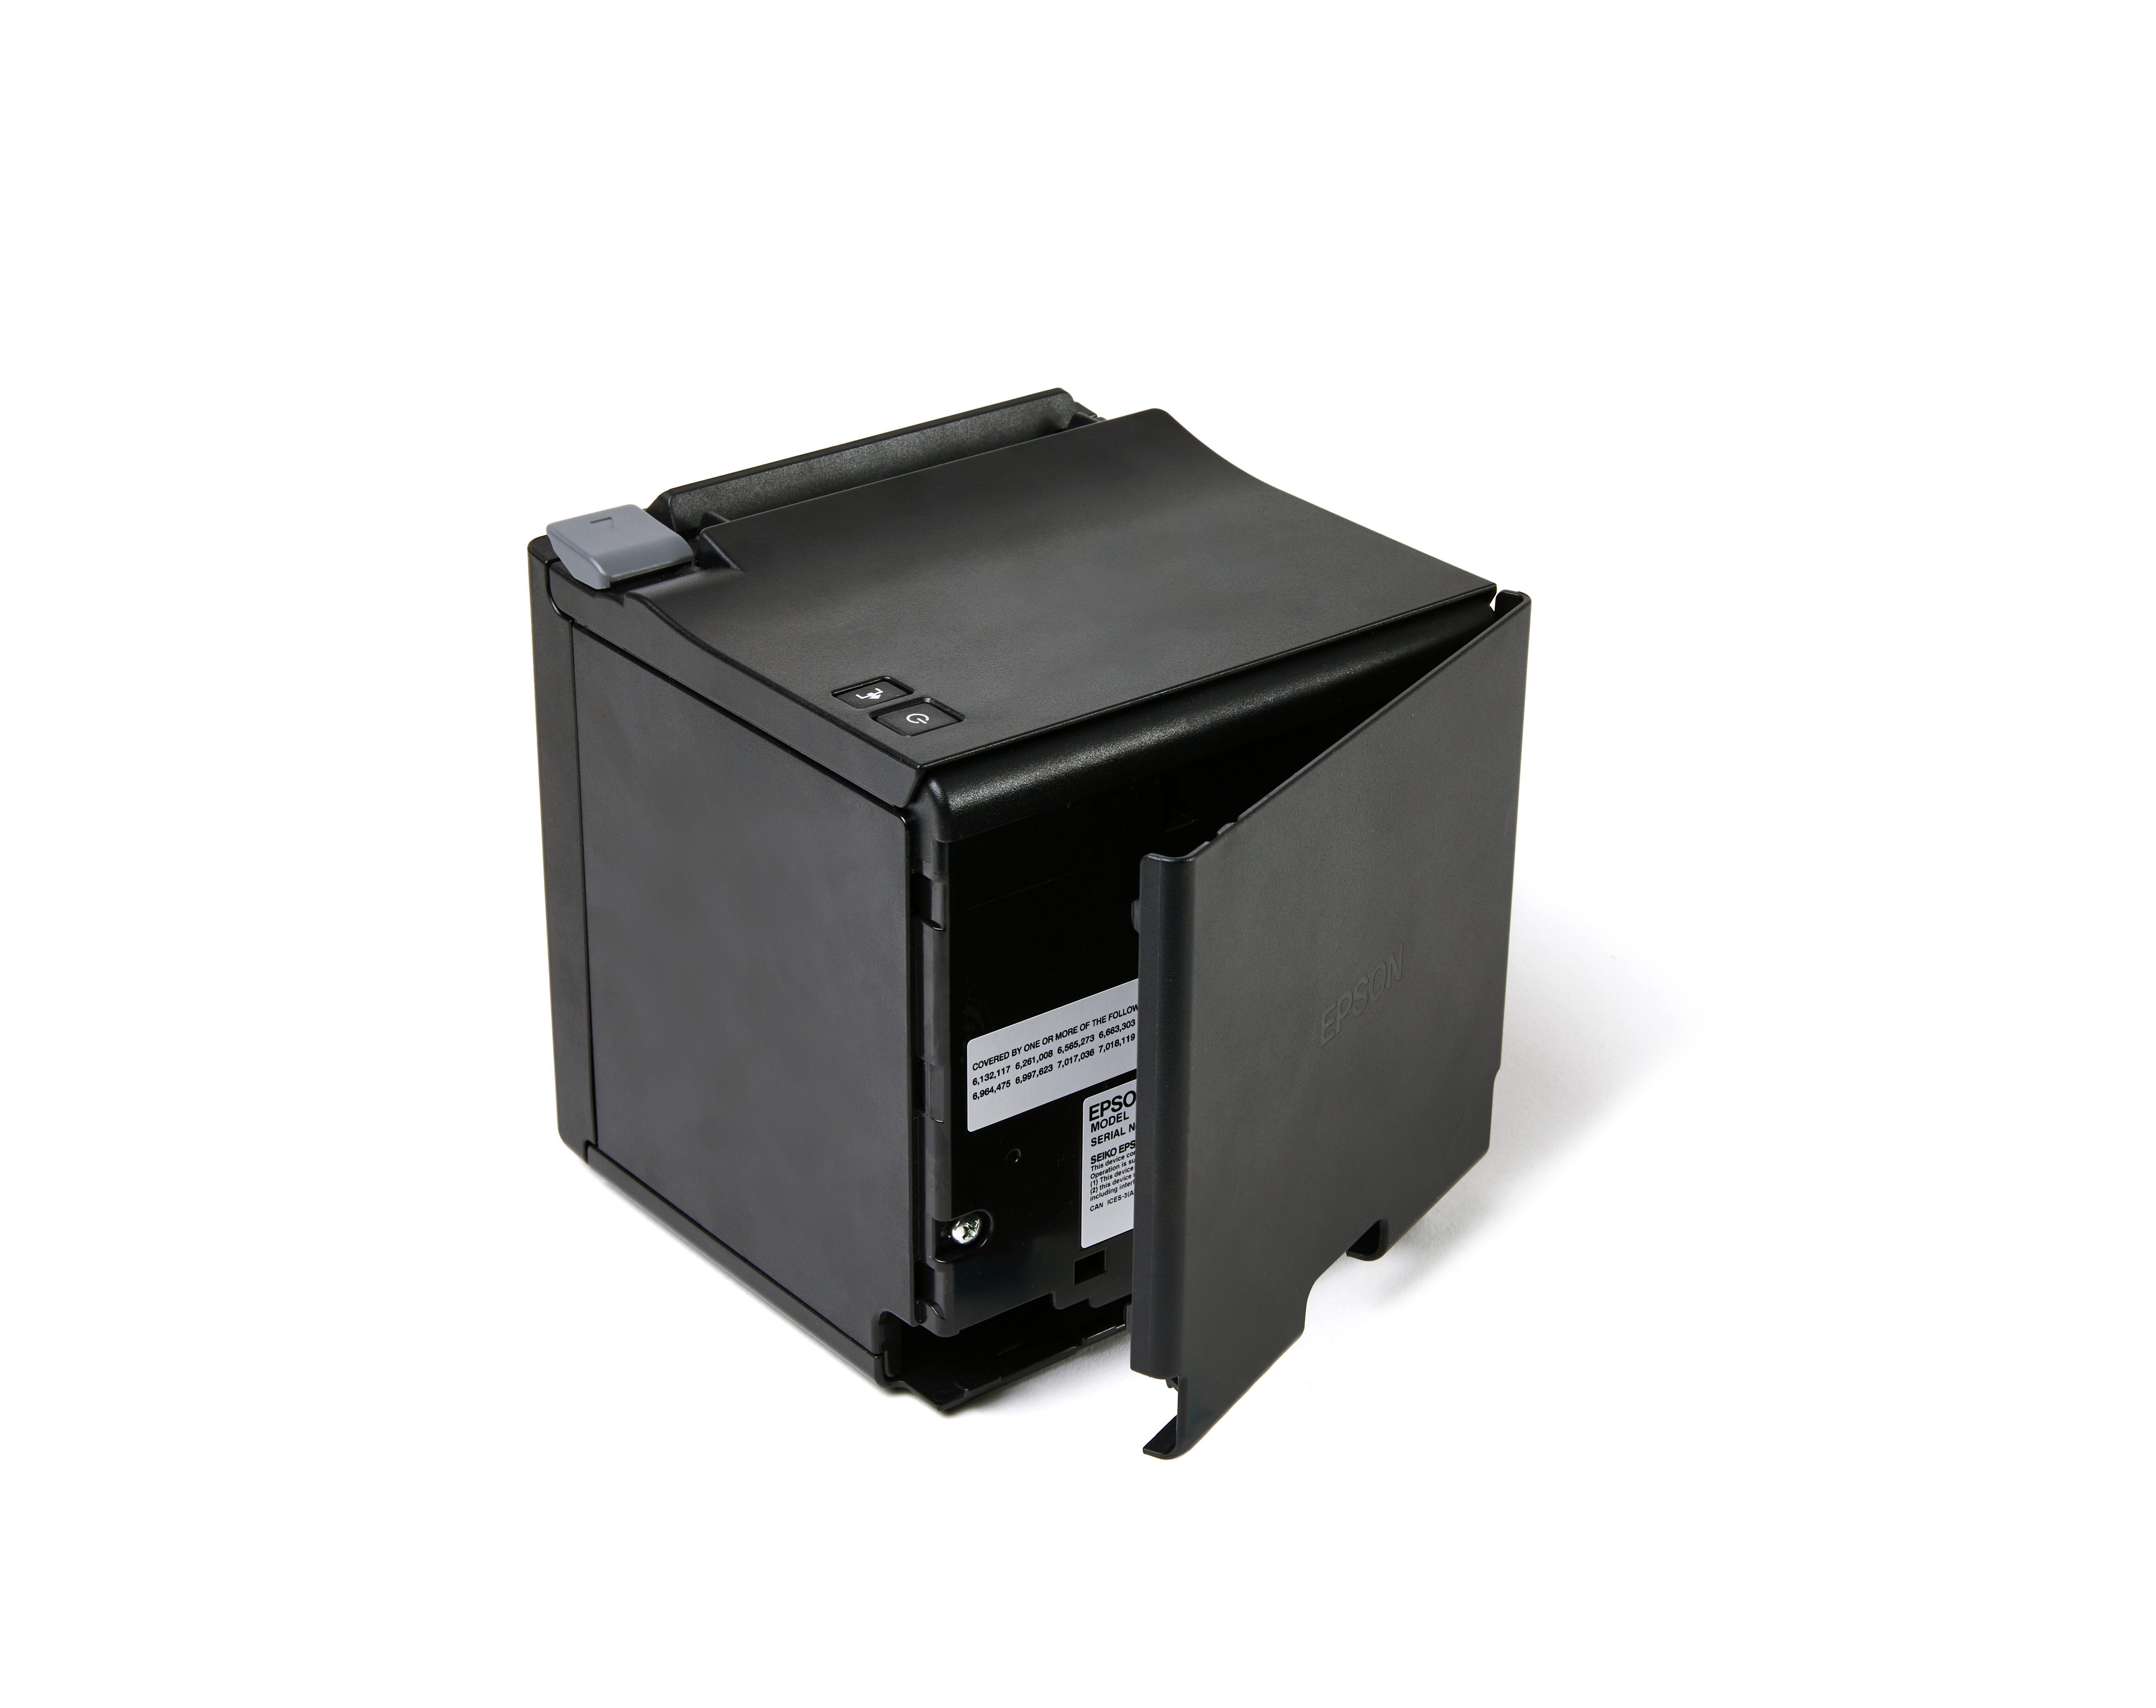
Step 5: Turn on your printer. The power LED light will stop blinking and become solid once your printer is ready.
Step 6: Insert a paper roll. To open the printer's cover, push the lever on the right-hand side of the cover away from you and lift the cover upwards.
Insert the paper roll in the following orientation. While doing so, make sure the paper roll stays taut and doesn't unroll.

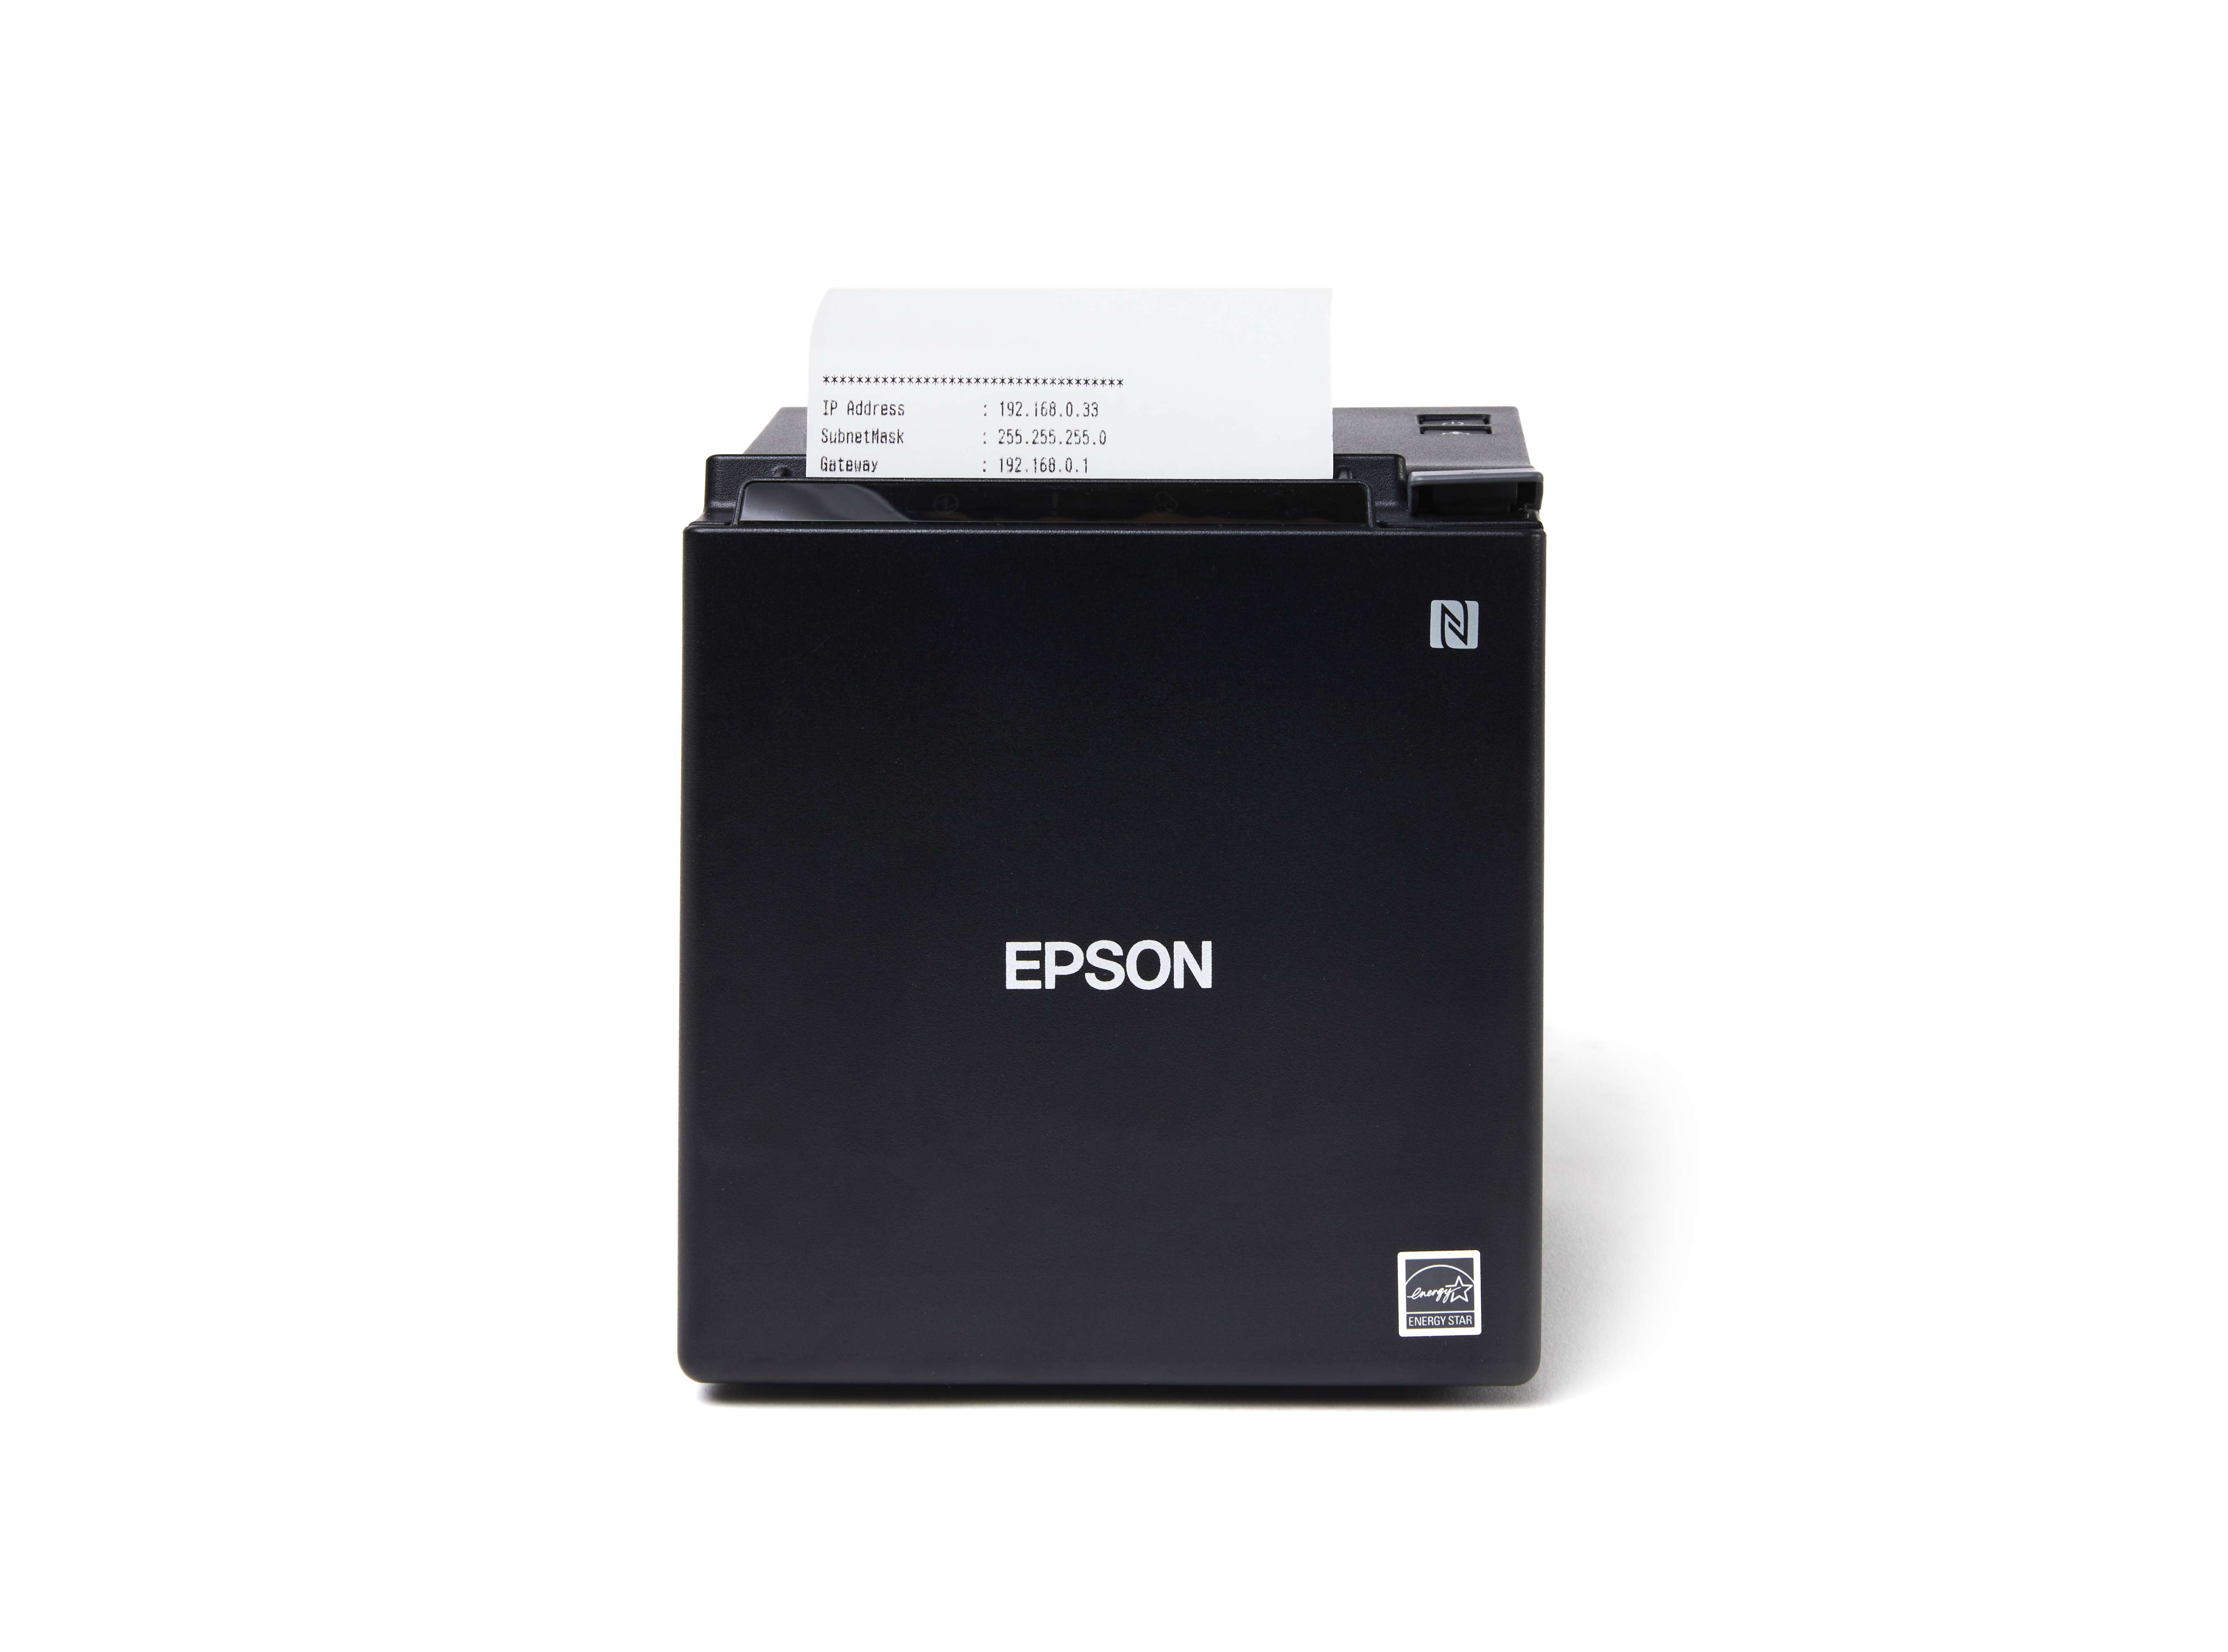
Step 7: Pull the paper out past the cutter at the front of the printer. Push the cover down to snap the lever shut. A printout with your IP address will print to confirm it's successfully connected to your network.
Step 8: Common Troubleshooting:
ERROR indicator is blinking red
This is caused when there is no paper present in the printer. Open the printer, replace the paper, and close the lid. The ERROR indicator should stop blinking and the READY indicator should light up.
Paper jams
If you feed the paper into the receipt printer at an angle, then a paper jam is likely to happen. If this happens, then turn off the printer, open it up, and feed the paper in again.
If you're trying to make your receipt narrower than the specified 3 inch width, then make sure that you use the divider provided. Don't fold the paper when you feed it into the printer.