- Club Caddie
- Settings
- Course User Info
-
Troubleshooting
-
General
-
Settings
- 3P Integrations
- Card Connect
- Clover
- POSLink
- Class Management
- Class Rate Management
- Course User Info
- Day End Closing
- Event Settings
- Floor Plan
- General Course Info
- I-Frames
- Inventory Center
- Manage Roles
- Membership Settings
- Mobile App Builder
- Payroll Center
- Punch Card Type Center
- Register Settings
- Rack Rate Management
- Tax Management
- Tee Sheet Settings
- Terminal Management
- Venue Center
-
Support
-
Register
-
Tee Sheet
-
Starter Sheet
-
Activities
-
Events
-
On Demand
-
Customers
-
Members
-
Vouchers
-
Sales
-
Reports
-
Quickbooks
-
Hardware
-
Mobile App
-
Email Marketing
-
KDS (Kitchen Display System)
-
Video Training
Settings : Multiple Job Roles
Article Contents: This article explains the use of Multiple Job Roles. Allowing employees to hold multiple roles within the system, simplifying payroll and time management. Employees can seamlessly switch between them as needed
Step by step:
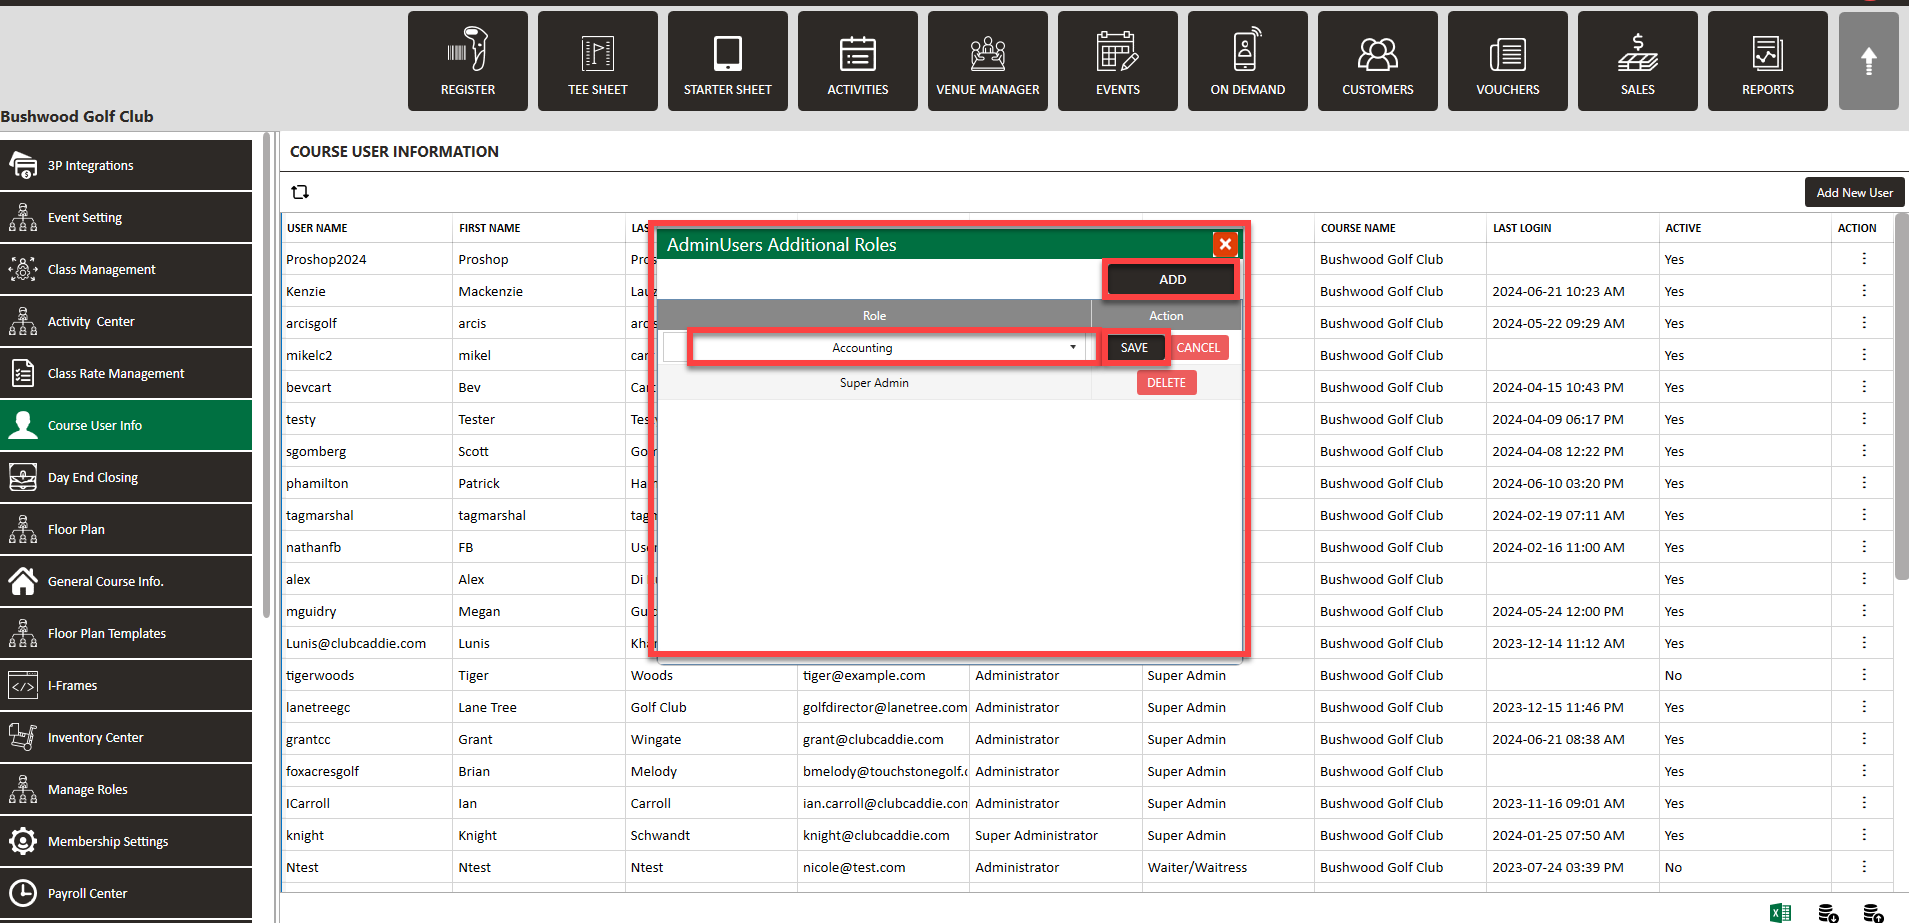
Step 1: Navigate to Settings > Course User Info > then click on Action next to the employee.
Step 2: Select Manage Additional Roles. Then in the pop-up window, click Add and chose the role you wish to add. Click Save.

Step 3: When logging in, select the role along the top left.
Step 3: When logging in, select the role along the top left.
While logged in, select Switch Role.
When clocking in, the system defaults to the signed-in role, but users can switch roles if needed. This simplifies payroll and time management by consolidating roles under one login. The Payroll Center lists different roles for each employee, ensuring accurate tracking of hours. The clock-in/clock-out report details entries by role.
In the Payroll Center, under the Payroll Summary or Time Log, you'll see the different roles listed for each employee.