- Club Caddie
- Members
- Membership Portal
-
Troubleshooting
-
General
-
Settings
- 3P Integrations
- Card Connect
- Clover
- POSLink
- Class Management
- Class Rate Management
- Course User Info
- Day End Closing
- Event Settings
- Floor Plan
- General Course Info
- I-Frames
- Inventory Center
- Manage Roles
- Membership Settings
- Mobile App Builder
- Payroll Center
- Punch Card Type Center
- Register Settings
- Rack Rate Management
- Tax Management
- Tee Sheet Settings
- Terminal Management
- Venue Center
-
Support
-
Register
-
Tee Sheet
-
Starter Sheet
-
Activities
-
Events
-
On Demand
-
Customers
-
Members
-
Vouchers
-
Sales
-
Reports
-
Quickbooks
-
Hardware
-
Mobile App
-
Email Marketing
-
KDS (Kitchen Display System)
-
Video Training
Members : Setting up Auto-Pay
Article Contents: This article contains instructions on how to set up auto-payments for your membership account.
Step-By-Step:
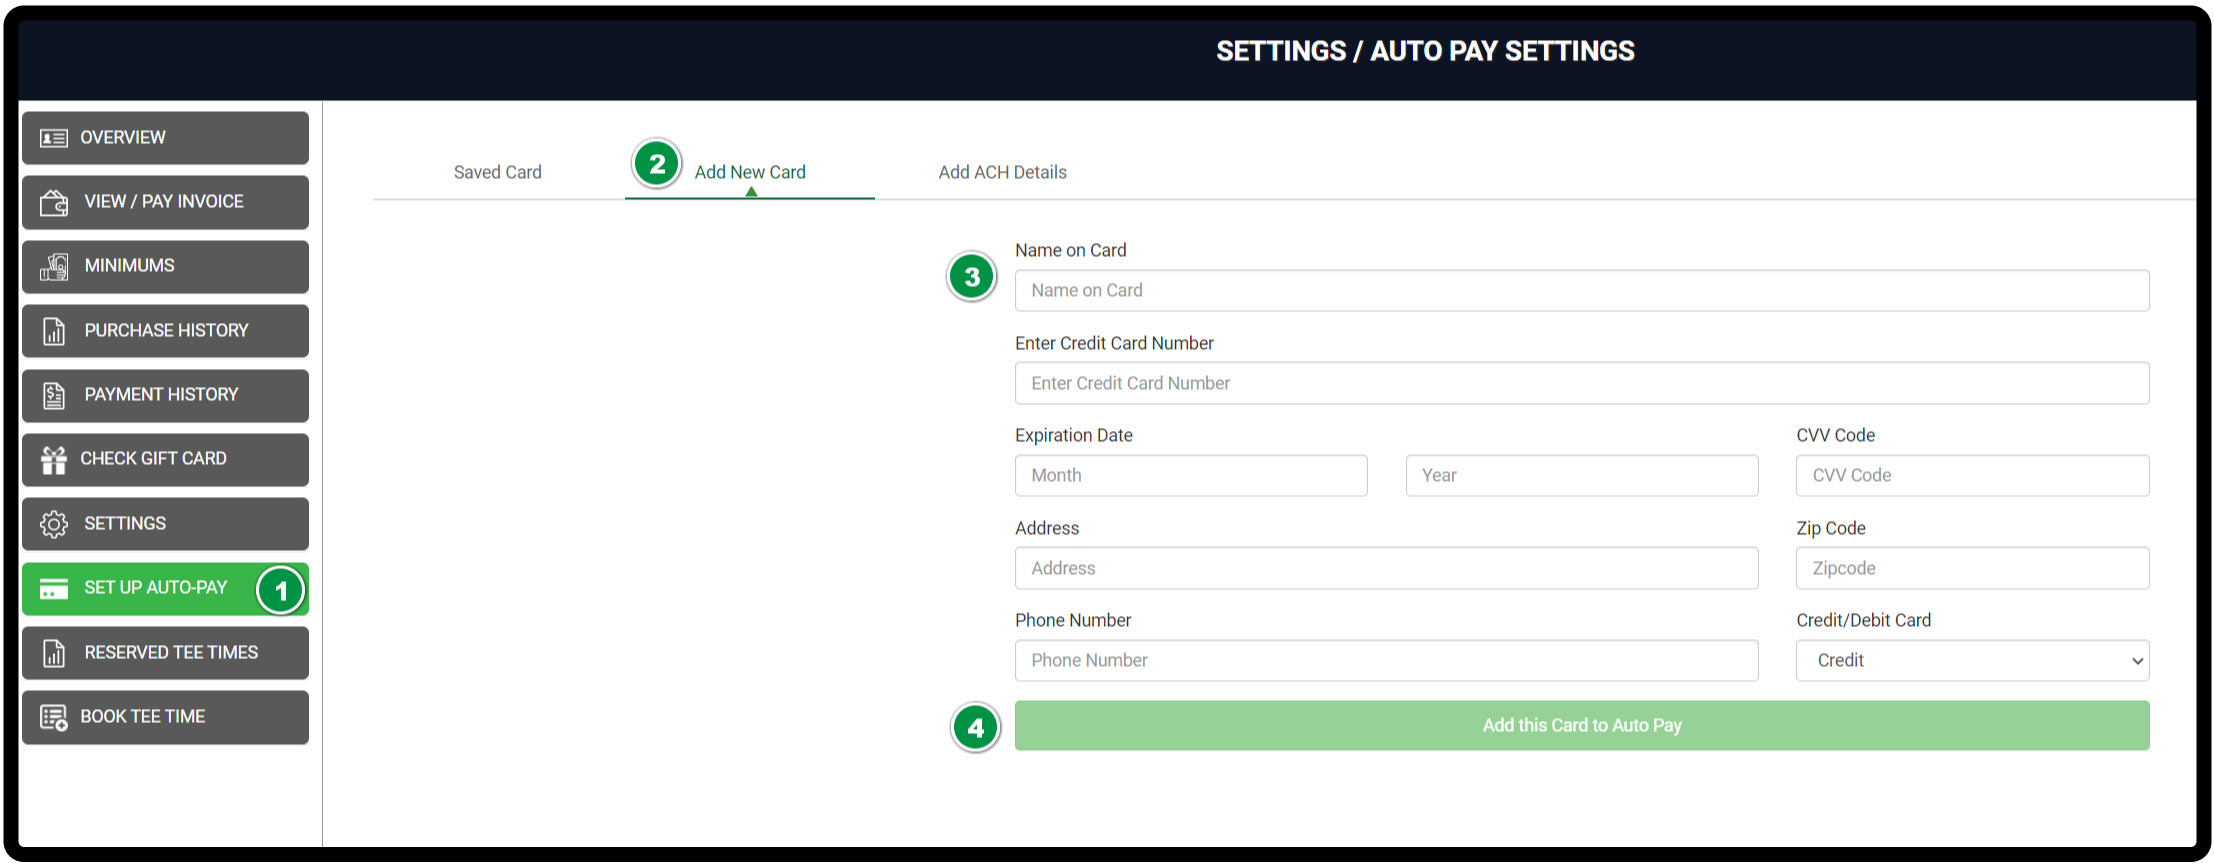
Step 1: On the left-hand navigation menu select “Set Up Auto-Pay” (1) and then along the top navigation bar select “Add New Card” (2).
Step 1: On the left-hand navigation menu select “Set Up Auto-Pay” (1) and then along the top navigation bar select “Add New Card” (2).
Step 2: You’ll be prompted to input your name, card details, address, and a phone number -if required (3).
Step 3: After filling out the details select “Add this card to Auto-Pay” (4).
Step 3: After filling out the details select “Add this card to Auto-Pay” (4).
Adding an ACH account:
Step 1: On the left-hand navigation menu select “Set Up Auto-Pay” (1) and then along the top navigation bar select “Add ACH Details”.
Step 2: You’ll be prompted to input your name, ACH details, and address information (3).
Step 3: After filling out the details select “Add Account” (4).