- Club Caddie
- Hardware
-
Troubleshooting
-
General
-
Settings
- 3P Integrations
- Card Connect
- Clover
- POSLink
- Class Management
- Class Rate Management
- Course User Info
- Day End Closing
- Event Settings
- Floor Plan
- General Course Info
- I-Frames
- Inventory Center
- Manage Roles
- Membership Settings
- Mobile App Builder
- Payroll Center
- Punch Card Type Center
- Register Settings
- Rack Rate Management
- Tax Management
- Tee Sheet Settings
- Terminal Management
- Venue Center
-
Support
-
Register
-
Tee Sheet
-
Starter Sheet
-
Activities
-
Events
-
On Demand
-
Customers
-
Members
-
Vouchers
-
Sales
-
Reports
-
Quickbooks
-
Hardware
-
Mobile App
-
Email Marketing
-
KDS (Kitchen Display System)
-
Video Training
Hardware : How to Calibrate a Windows 10 Touch Screen
Article Contents: This article summarizes the steps needed to ensure your touch screen is calibrated.
Step by Step
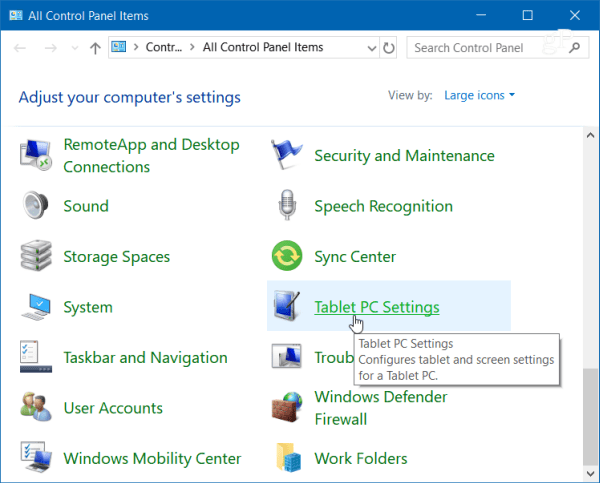
Step 1: Open the Control Panel and select Tablet PC Settings.
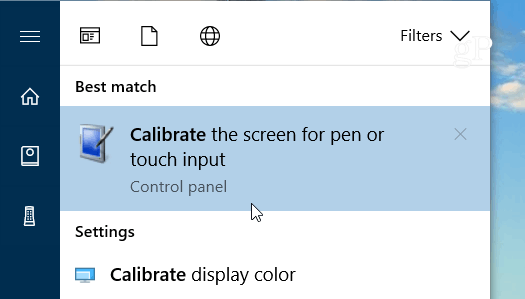
Step 2: Or, hit the Windows key and type: calibrate and select the “Calibrate the screen for pen or touch input” result at the top.
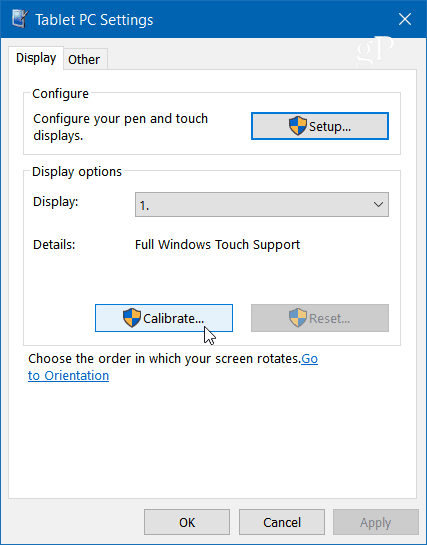
Step 3: It will have two tabs if you only have a touchscreen, but if you have configured a pen device, you will have three tabs. In the following example, I only have a touch screen – select the Calibrate button under the Display tab.
Step 4: Next, your screen will go white and display instructions for going through the calibration process. It’s a simple process. A crosshair will appear on the screen and each time you tap it will move to a different spot. Continue through the entire process, and when you’re finished, you’ll be prompted to save the results. The touch screen should now be more responsive and accurate when you interact with it.

Note: This process ensures that your touches are detected with the highest level of precision, enhancing overall user experience.