.png?width=200&height=89&name=CC%20%20fiserv.%20(3).png)
Step by Step

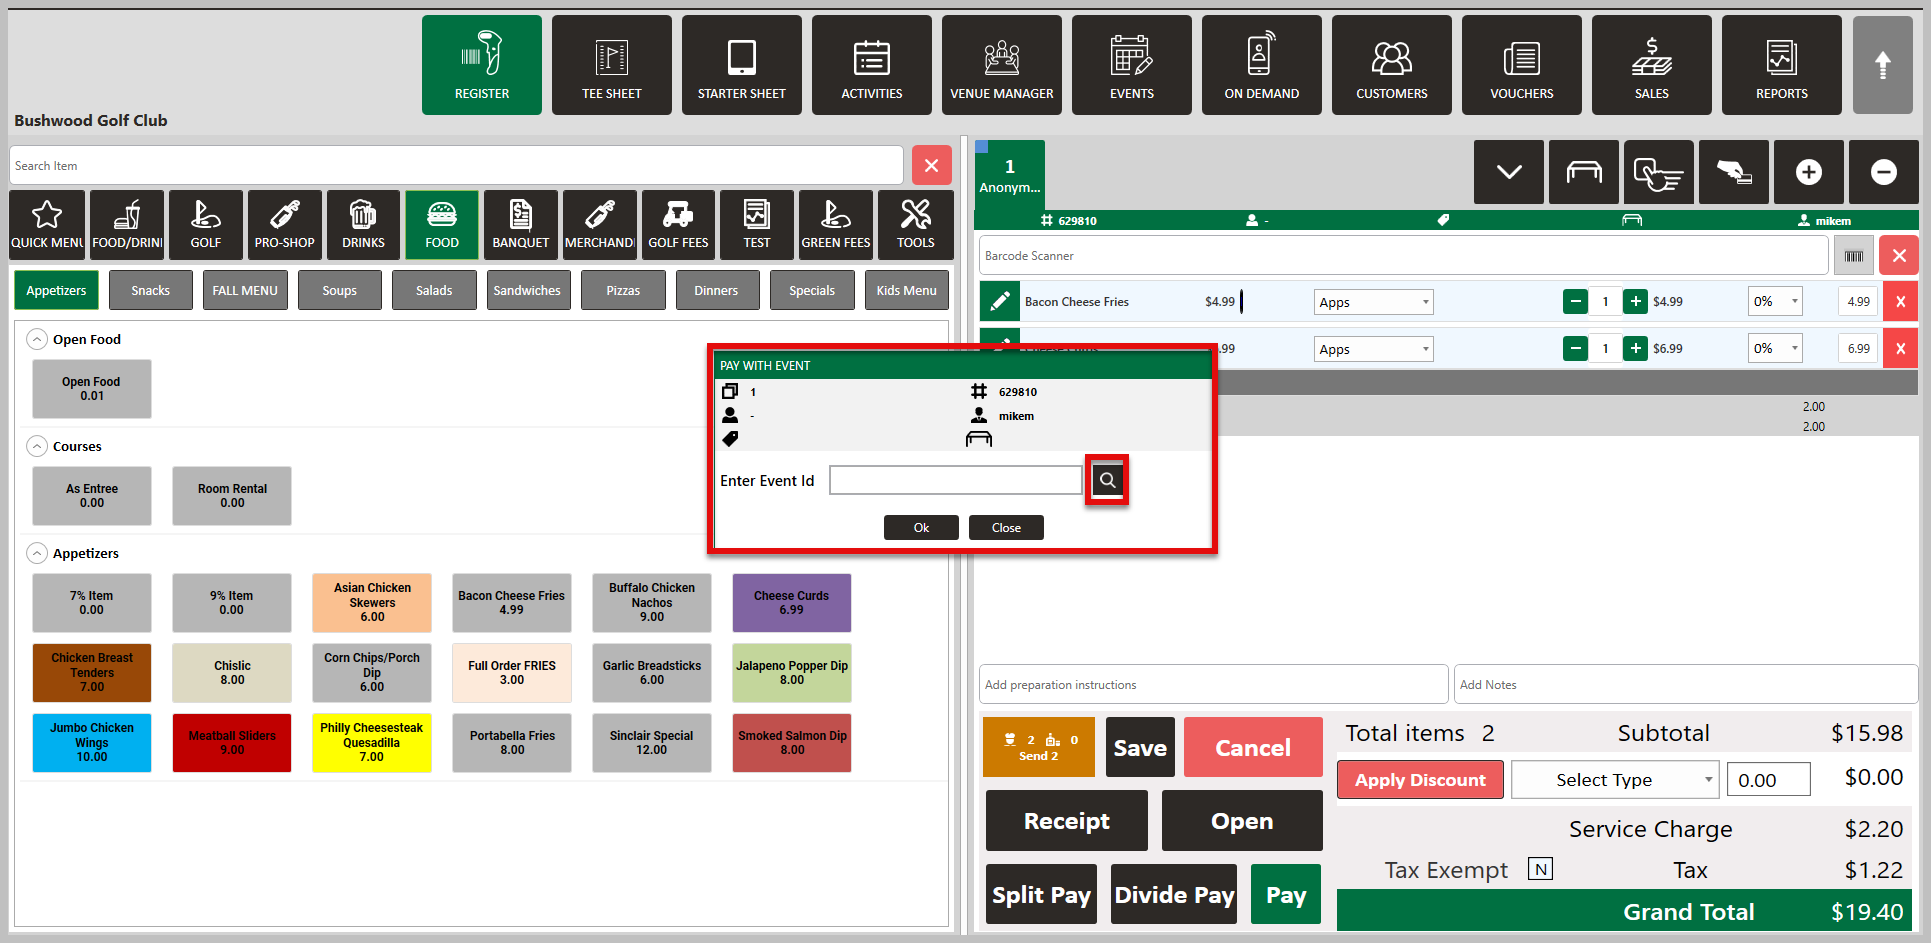
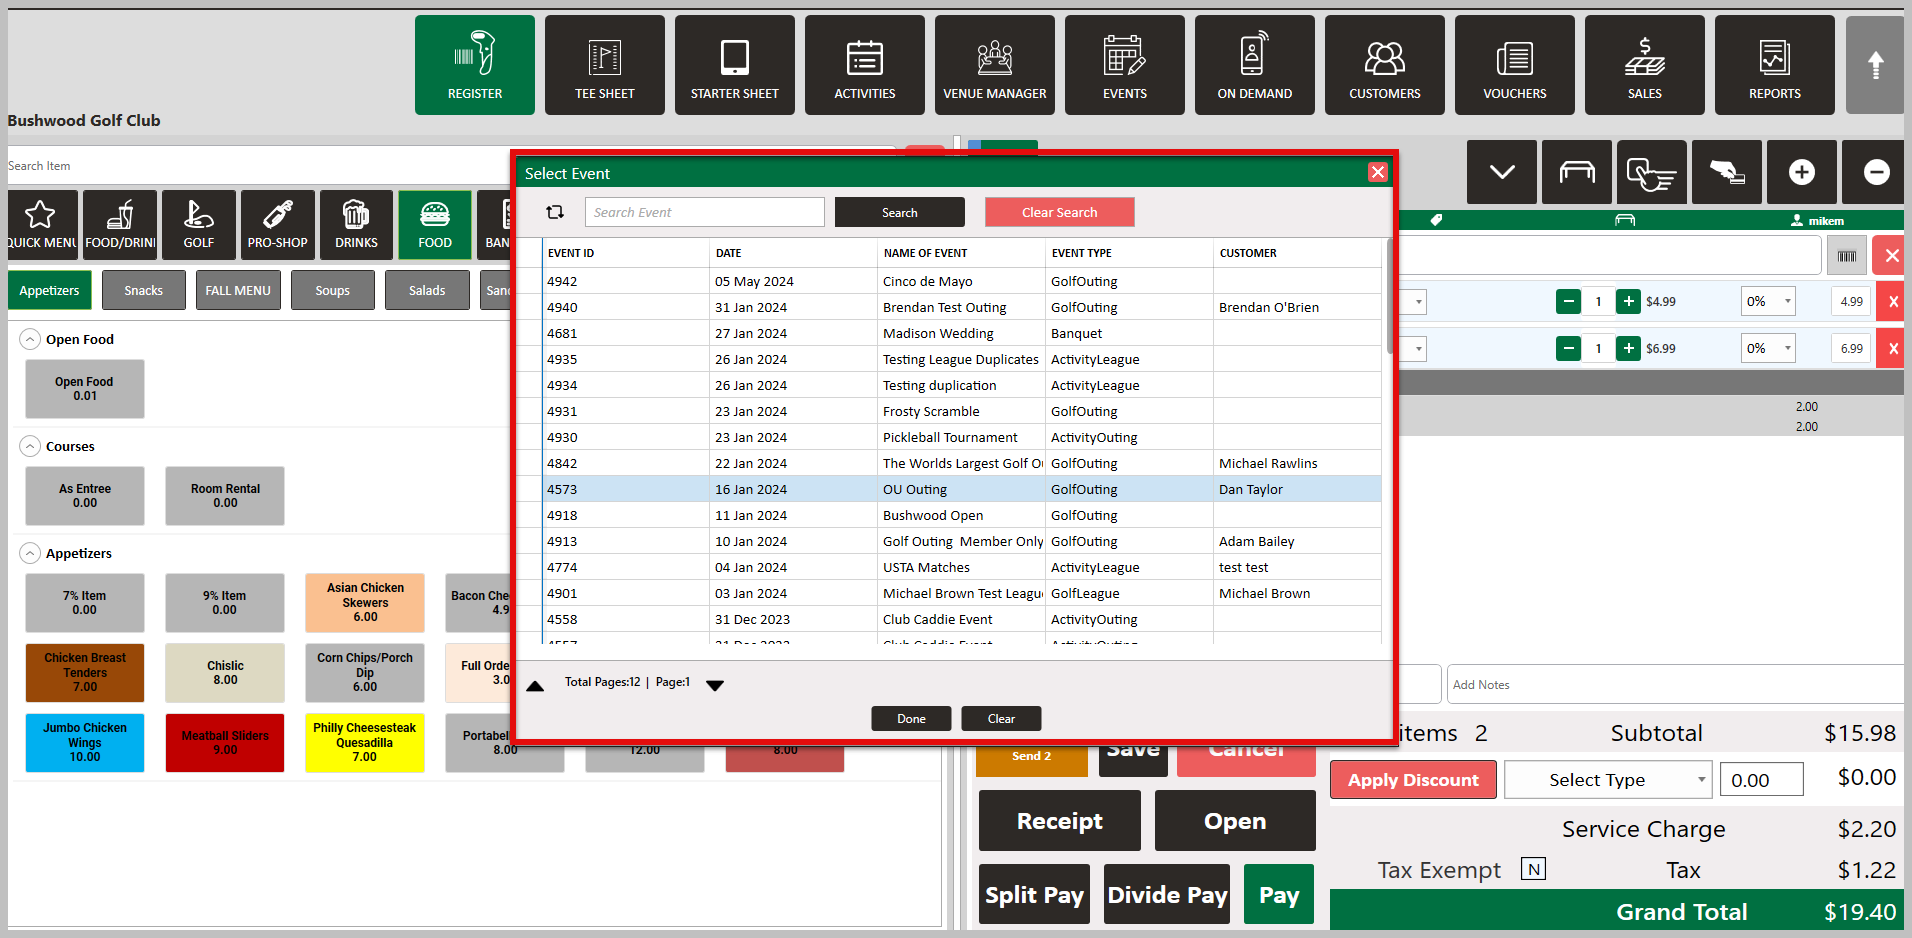
Step 3: In the Pay With Event pop-up window, enter the Event ID or search for the correct event using the magnifying glass.
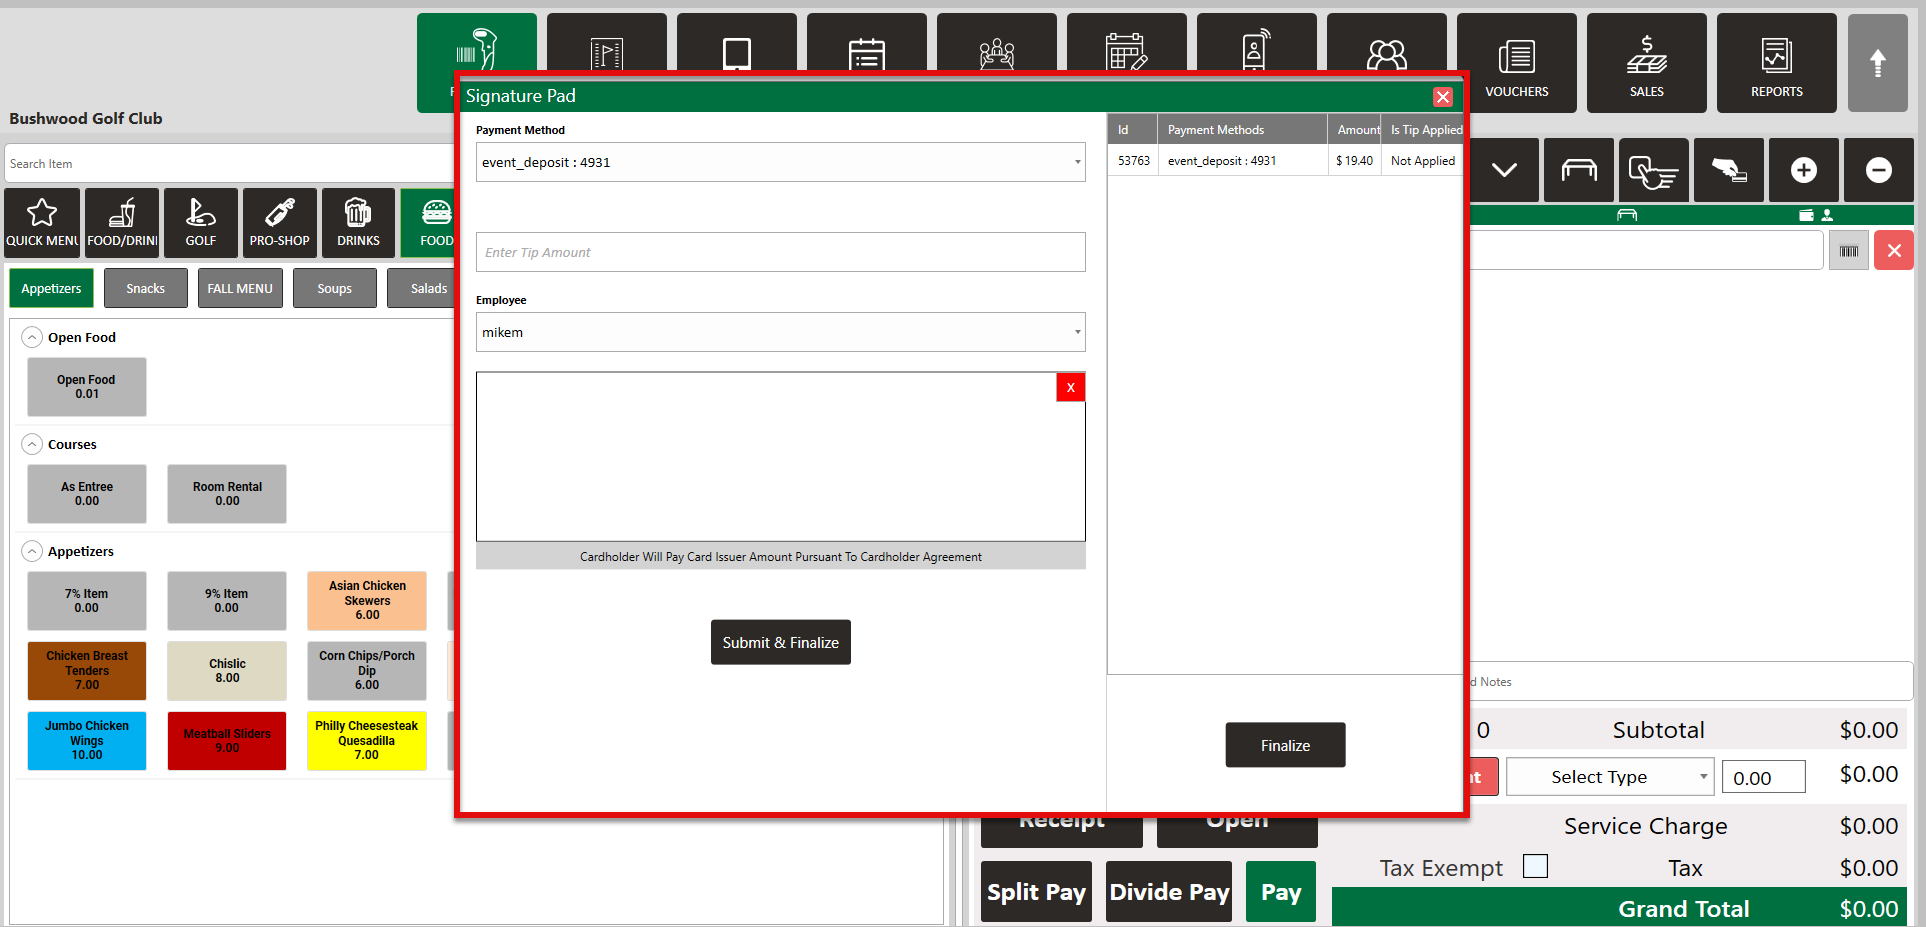
Step 4: After selecting your event, a Signature Pad window will generate. Here you can enter a tip amount, and submit and finalize.
Step 1: Navigate to the Register module.
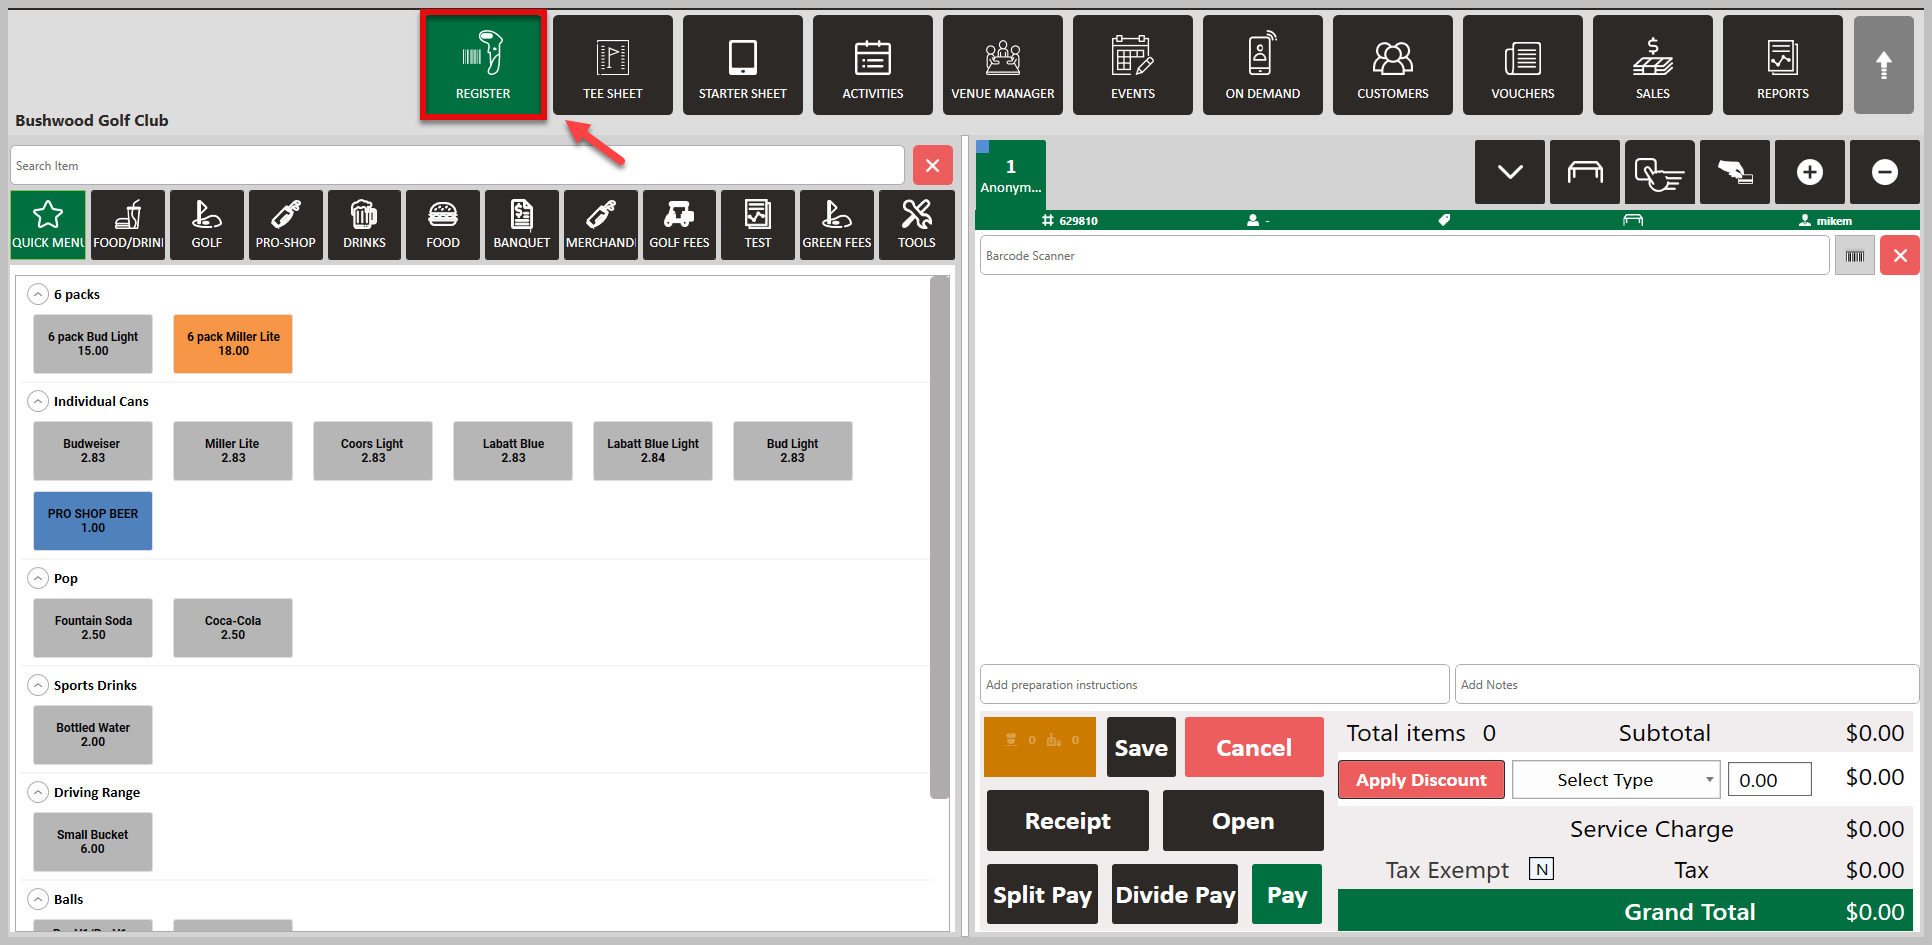
Step 2: Add items that you want to purchase and to be added to the event's invoice. Then, select Pay, followed by Event Charge.
Step 3: In the Pay With Event pop-up window, enter the Event ID or search for the correct event using the magnifying glass.
Step 4: After selecting your event, a Signature Pad window will generate. Here you can enter a tip amount, and submit and finalize.
These "Event Charges" will show in the Events Module in the "Ledgers" tab of the individual event, as well as the event invoice.