This article provides a step-by-step guide on how to send your first email campaign, including instructions for sending test emails, using the Inbox Preview tool, and sending the actual email to your subscribers.
Test Send
Please make sure to test before making a live send. Different email clients render HTML in different ways, so you'll want to send yourself test emails before sending a live email message to your subscribers.
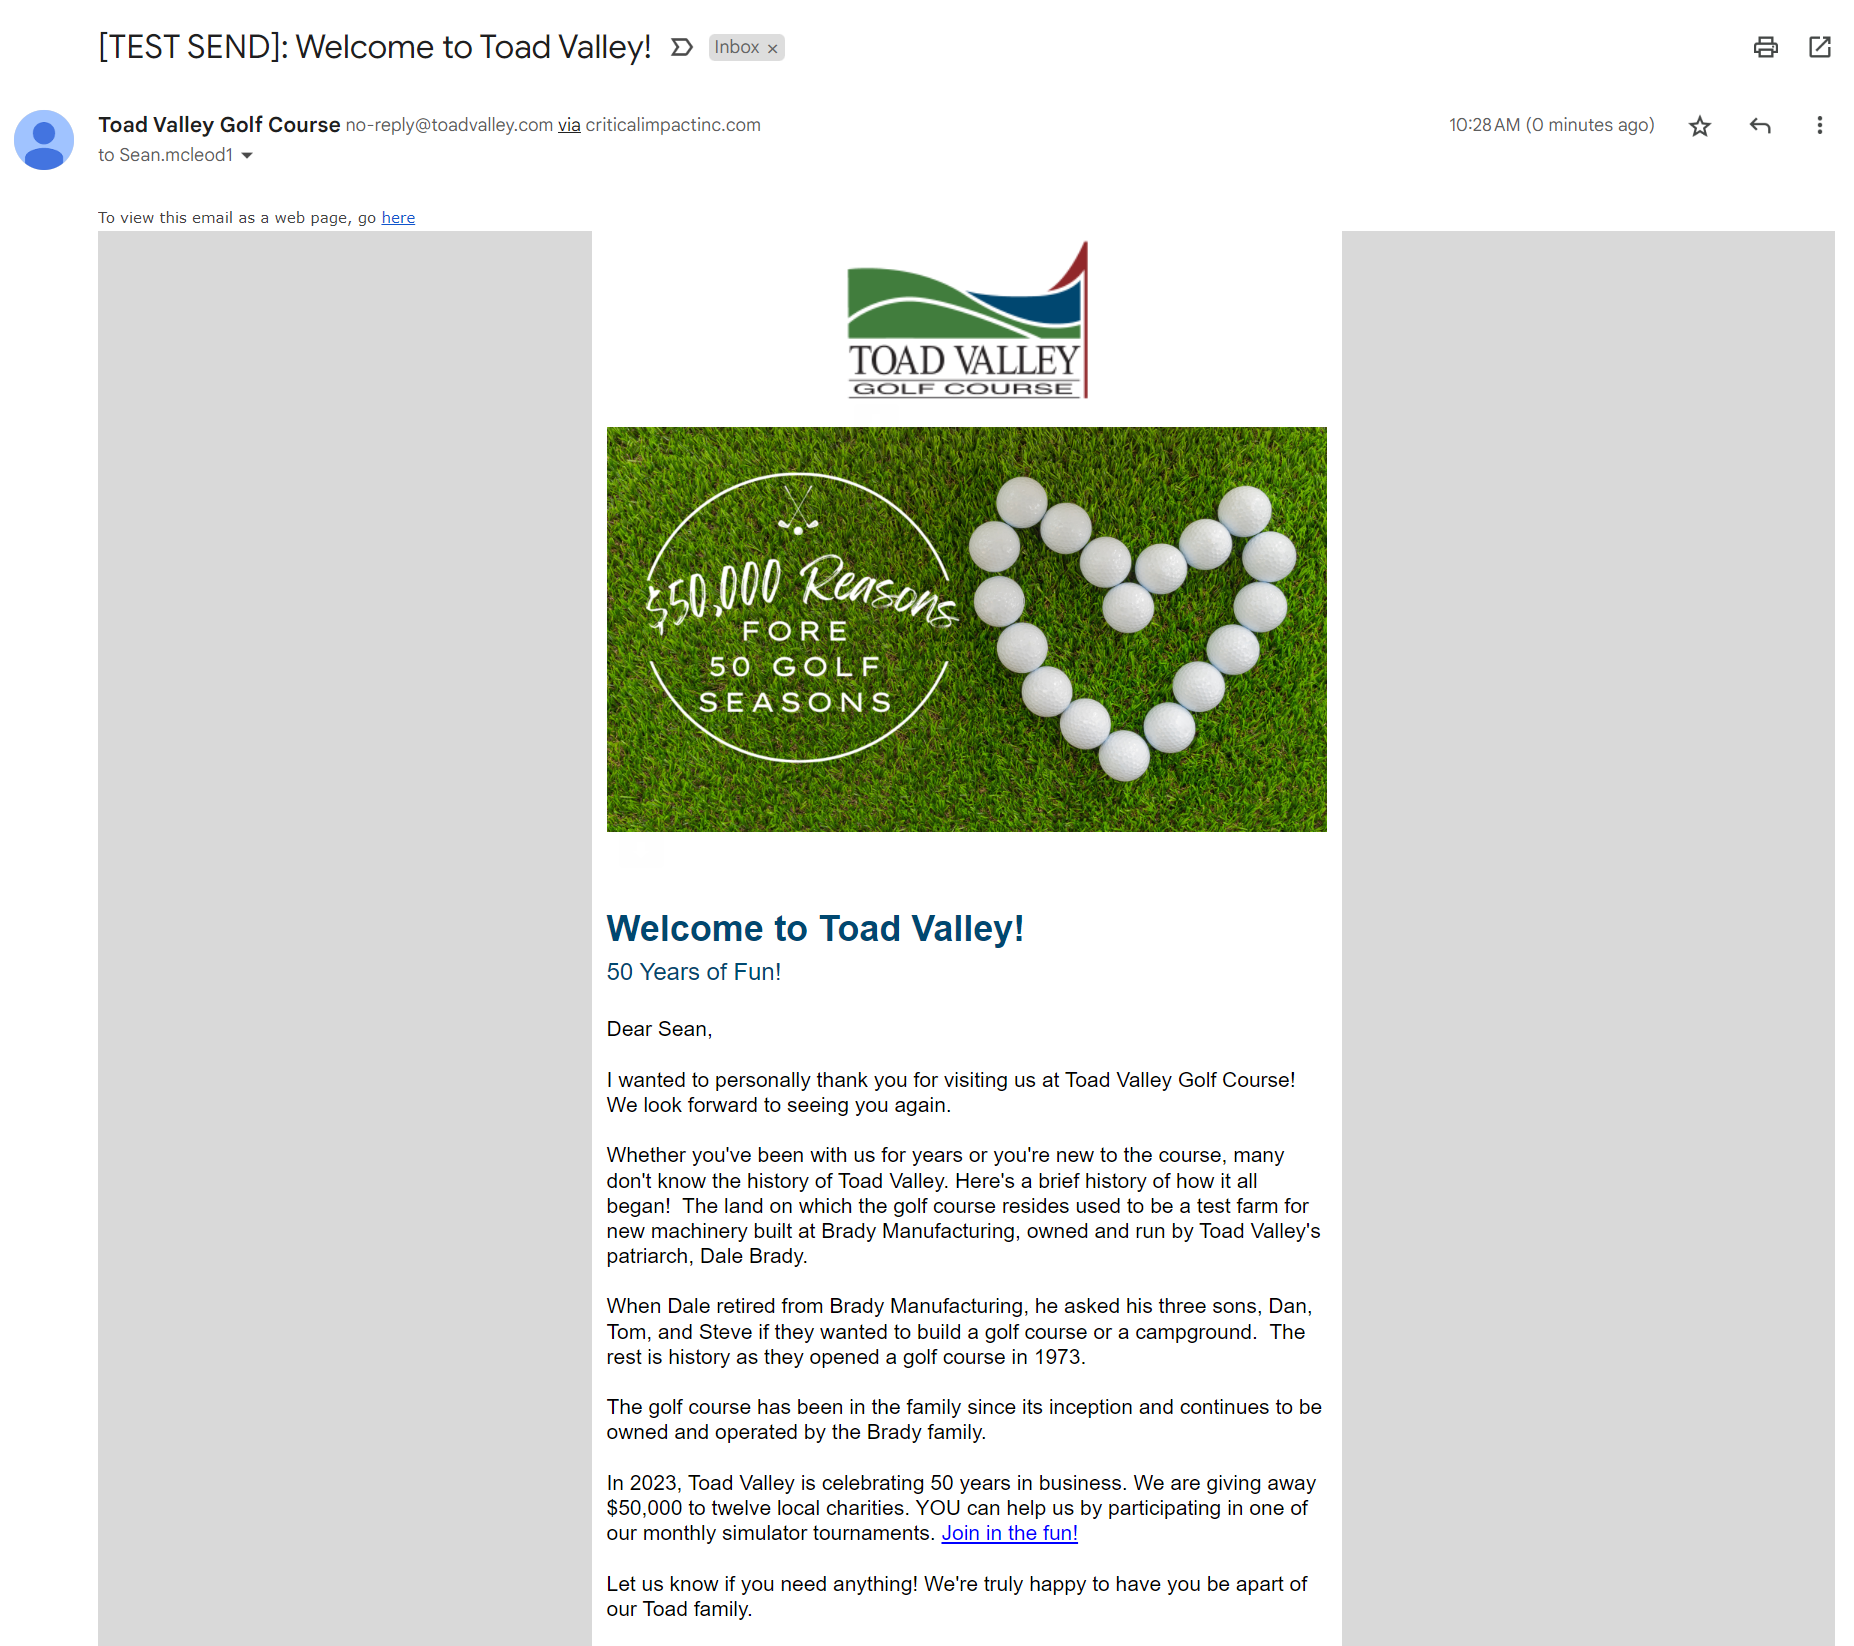
Test Send
To send yourself a test message:
- Open the message in the Messages folder
- Click the Test button in the top right corner of the message editor
- Enter your email address (up to 5 test emails can be sent from this window)
- Optional Features
- Impersonate Recipient: enter a subscriber's email address in order to receive this test send as if you were that subscriber. It will populate the mail merge variables with this subscriber's information
- Add a Note that will be added to the top of the test messages

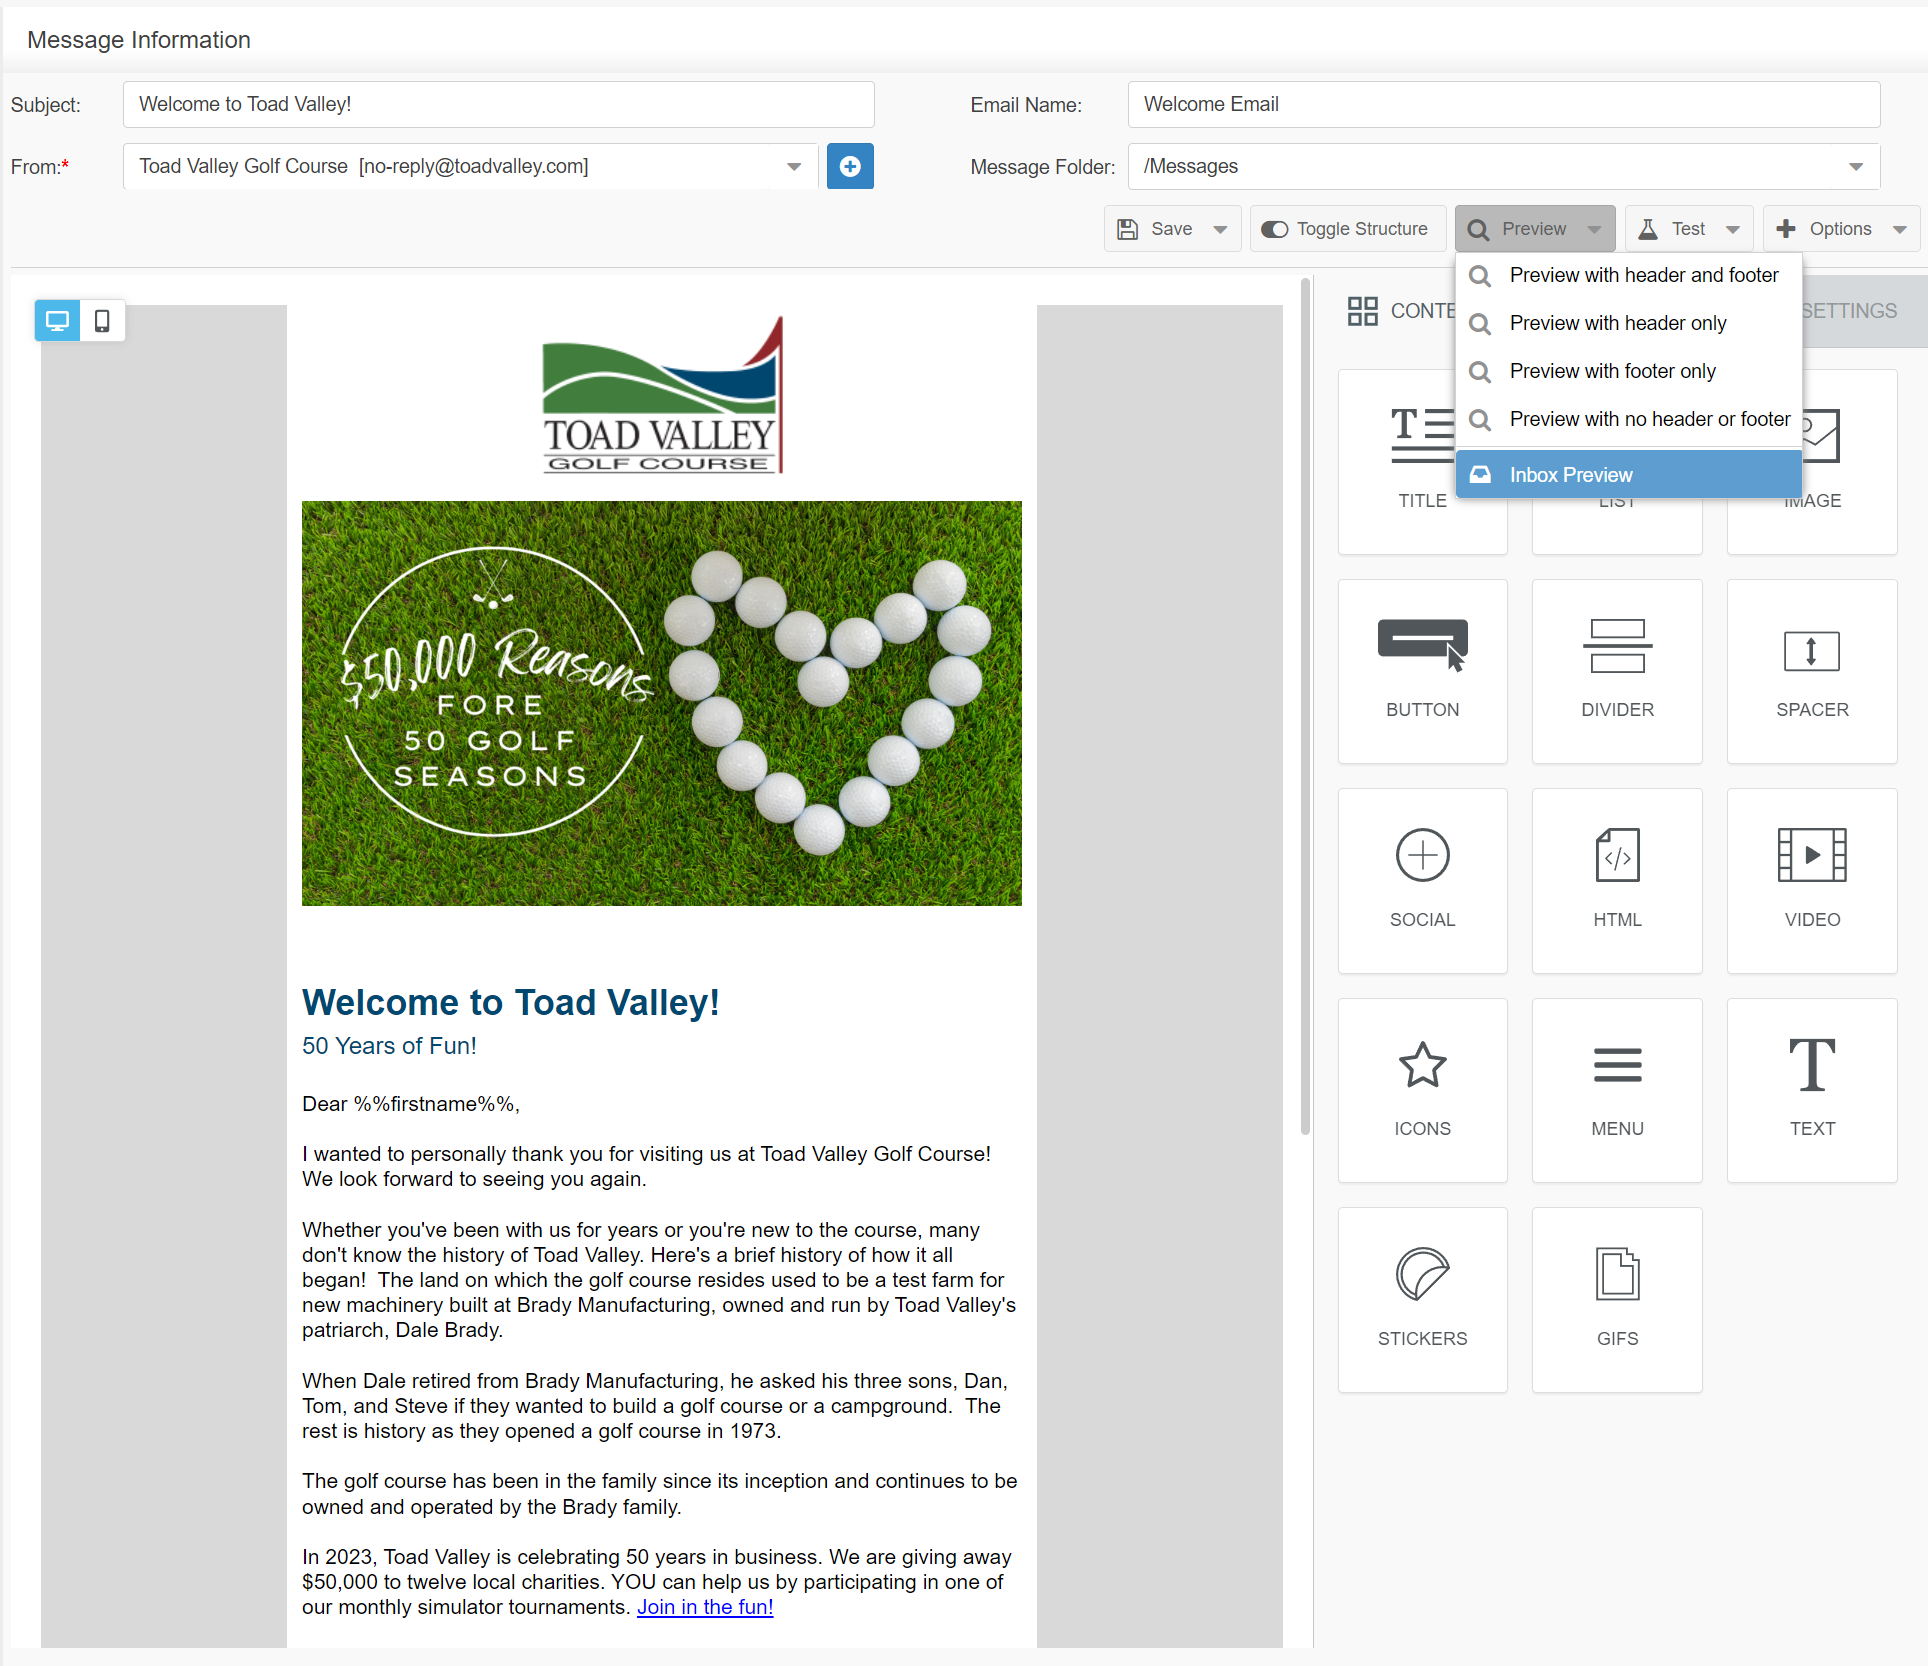
Run an Inbox Preview
The Inbox Preview tool lets you view screenshots of your email in 65 combinations of the most popular email clients and mobile devices.
Unlike web browsers, email clients are far more strict when it comes to HTML and CSS standards. Just because your email renders properly in a web browser does not mean it will render correctly in every inbox. Our service allows you to preview your email in 8 operating systems, 6 web browsers, and 32 email clients - all within one click.

Run an Inbox Preview
- Open a message in the Messages folder
- Click the arrow next to the Preview button at the top right of the Message Editor
- Click Inbox Preview
- Check the box next to the email clients you would like to view the email with - all available options are checked by default
- Click Run Test. Note: it can take a few minutes depending on the email selected
- Click on any email client to view the screenshot of the test email
Send an Email Message
- Click the Messages folder in the left-side menu
- Click the Message Folder
- Click the message you want to send from the list shown on the right
- Click the Send Message button
- Select the desired "From Name" from the drop-down
- Choose the desired list(s) by checking the box(es)
- Note: Each subscriber will only receive one copy of an email message, regardless of the number of selected lists that subscriber may be on
- Lists are pulled at the time the email is actually sent. This means that the estimated send size can change if new people are added to the list, subscribers unsubscribe, etc.

Send an Email Message
- Click Send Immediately or select a date and time to send
- Optionally edit the Advanced Options by clicking the arrow next to "Advanced Options": select a Footer or enable Google Analytics™ Link Tracking
- Click Next
- Check the box to confirm your selections are correct
- Click Send Email
